
Customer Support
WePanel Hosting – General guide for Reseller Hosting
With WePanel Reseller Hosting, you can easily manage the hosting packages you provide to your customers, create accounts, customize features, and maintain full control over each customer’s resources.
Accessing WePanel Hosting
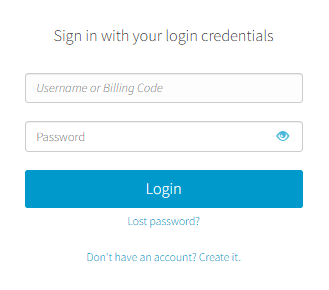
To access WePanel:
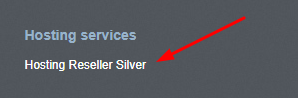
- From the right column, click on the Reseller Hosting package you want to manage.
- Click Manage to open the WePanel Hosting dashboard.

Available Options
In the main menu, you will find the following sections:
- Accounts
- Packages
- Feature List
Below is a detailed overview of each section.
Accounts
To create a new customer account:
- From the menu, click Accounts and then Create New Account.
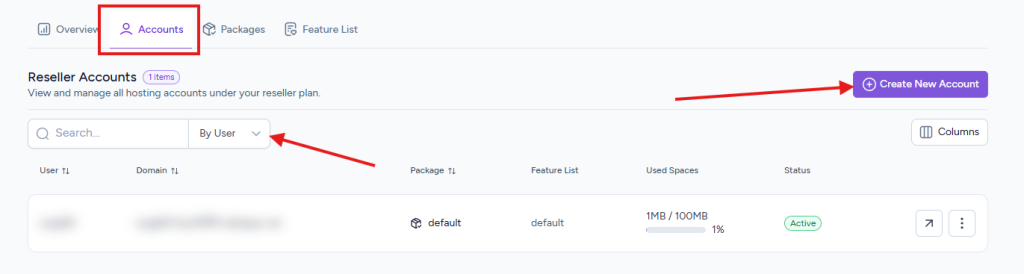
- You can search for existing accounts.
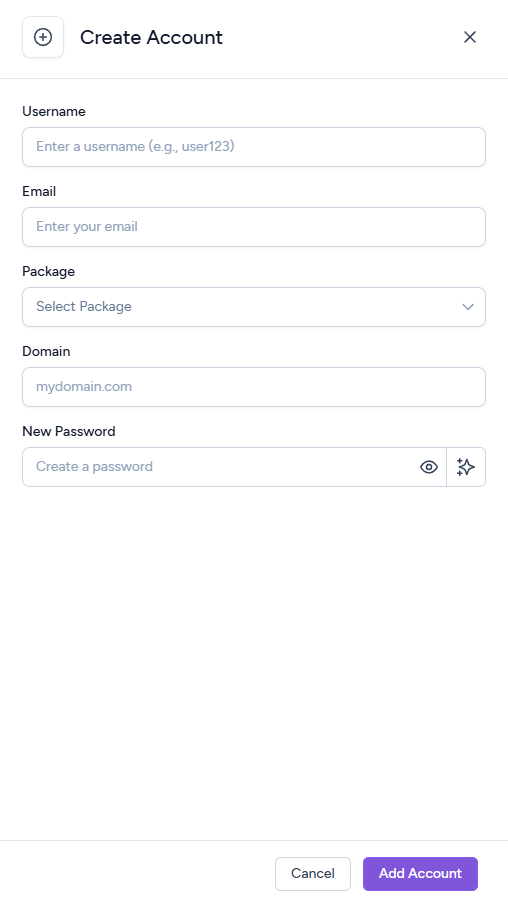
- Fill in the required details (username, email address, domain, password, etc.).
- Associate the customer with a package that you have already created.
- Click Create new account to save your changes.
User Management Options
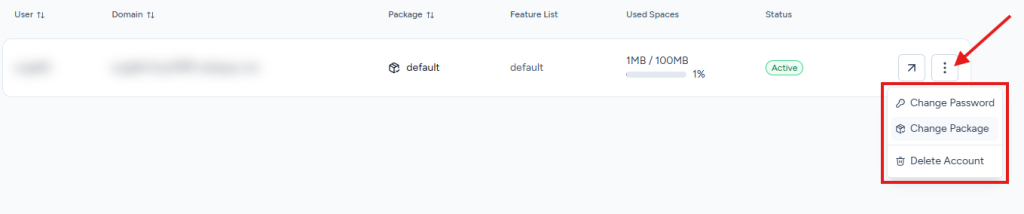
You can manage a user by selecting them and clicking the three dots displayed on the right-hand side of the user entry. The available options are:
- Change Password: Update the user's password.
- Change Package: Assign a new package to the user.
- Delete Account: Permanently delete the account and all associated data.
Important: Before creating a new customer account, you must first create a package.
Managing Hosting Plans (Packages)
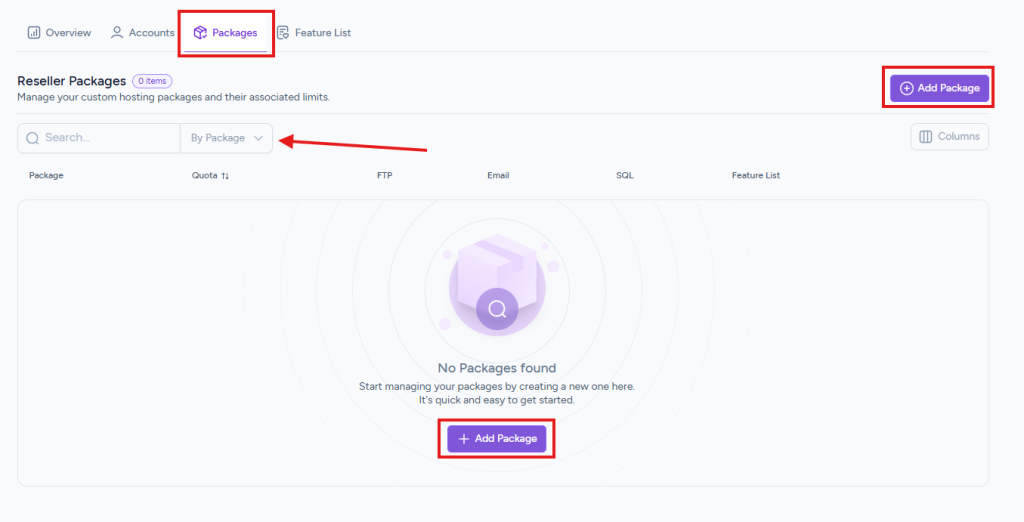
From the main menu, you can select Packages:
- to create a new package by clicking Add Package, or
- to search for and select an existing package for editing.
Package Settings
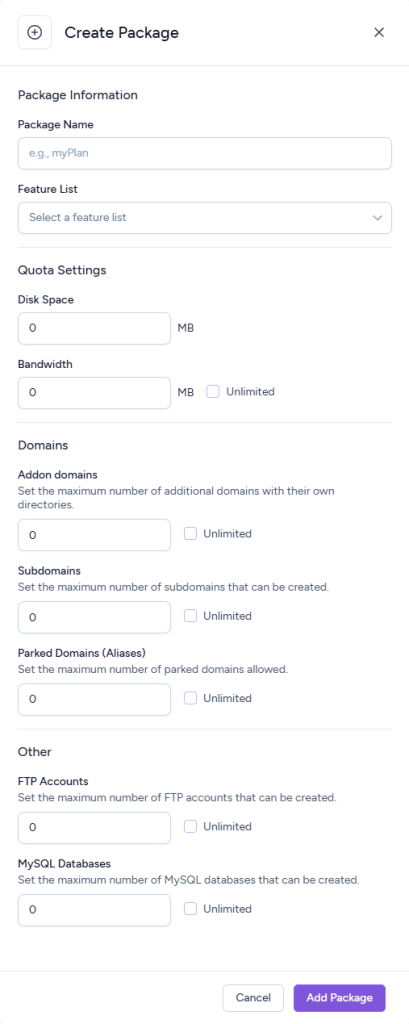
- Disk Space: Defines the storage allocated to the customer.
- Bandwidth: Sets the data transfer limit (to and from the website). You can leave it Unlimited if you don’t want restrictions.
- Addon Domains: Allows multiple websites under the same account.
- Subdomains: Enables creation of subdomains (e.g., blog.example.com).
- Domains (Aliases): Redirect multiple domains to a single website.
- FTP Accounts: Allows customers to manage files through FTP.
- MySQL Databases: Essential for dynamic websites and applications.
Managing Feature Lists
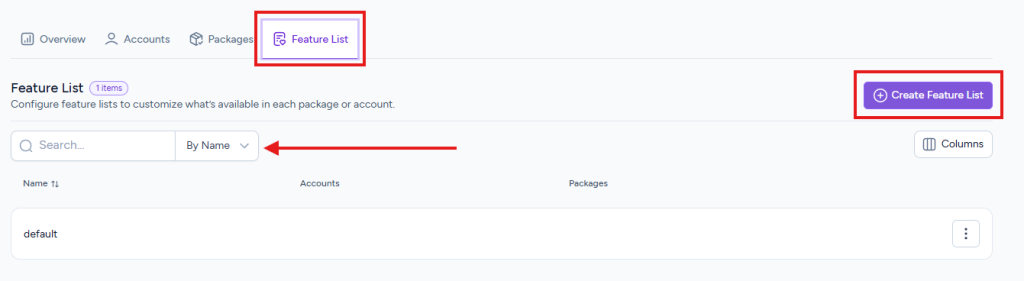
A Feature List defines which tools and functions a customer can access through their cPanel.
Steps:
- From the main menu, select Feature Lists and then click Create Feature List.
- Give the feature list a name and select the features you want to enable.
- Save the list by clicking Add Feature List.
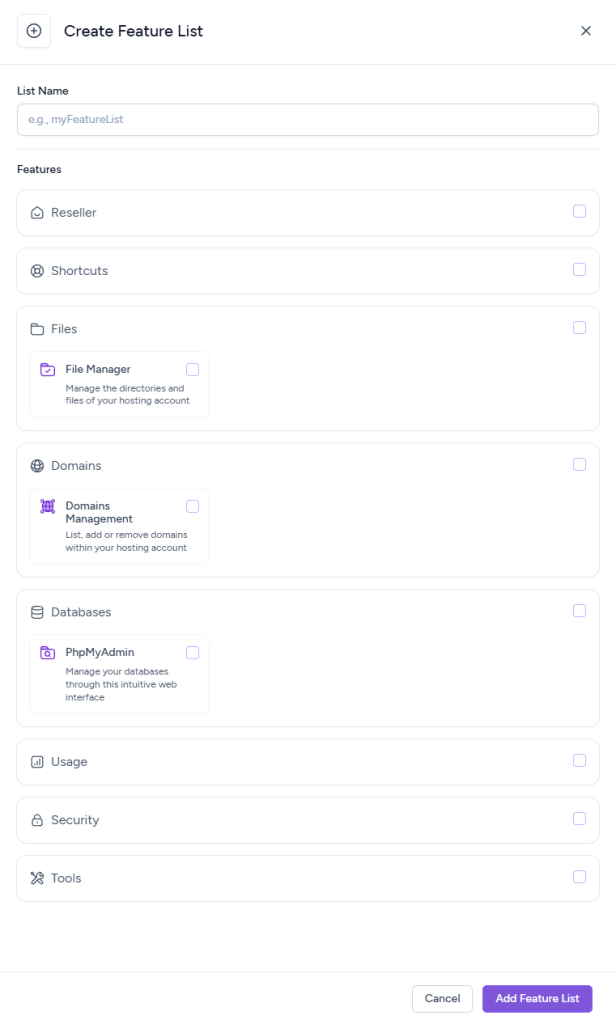
- You can manage a feature list by selecting it and clicking the three dots on the right-hand side of the corresponding entry. The available options are:
- Edit Feature List: Modify the settings of an existing feature list.
- Assign to Account: Assign the feature list to a user.
- Delete Feature List: Permanently delete the feature list and its associated features.

Accessing the Customer Control Panel
If you want to view a customer's control panel as if you were the customer, simply click the arrow button on the right-hand side of the customer entry to be redirected to their control panel.

This gives you full access to manage every aspect of their account.
Frequently Asked Questions (FAQ)
Can I rename a Feature List?
No. If you need to change the name, you must delete it and create a new one.
What happens if a customer exceeds their package limits?
The system will automatically block additional usage (e.g., uploading new files) until the package is upgraded or content is removed.
Is SSH access supported?
Yes, but it is not enabled by default. It can only be activated upon request.
Can I change a customer’s package after it has been created?
Yes. From the Reseller Dashboard → Options → Change Package, you can change the package at any time.
You haven't found what you are looking for?
Contact our experts, they will be happy to help!
Contact us