Customer Support
Add email to iOS device – Apple iPhone
Apple Mail is the pre-installed email client on all iOS devices. It allows you to manage your emails easily through a clean, user-friendly interface, without the need for third-party apps. Being tightly integrated into iOS, it offers excellent performance, stability, and usability.
Why use Apple Mail:
- Seamless integration with iOS — no installation required
- Push notifications for new emails
- Supports multiple email accounts (IMAP, POP, Exchange)
- Secure access with SSL and privacy protections
- Integrates with other Apple apps (Calendar, Contacts, Notes, etc.)
- Intuitive interface, customizable to your preferences
What you’ll need:
- Your email address
- Your email password
- Incoming and outgoing mail server settings
Step-by-Step: Add Your Email Account to iOS
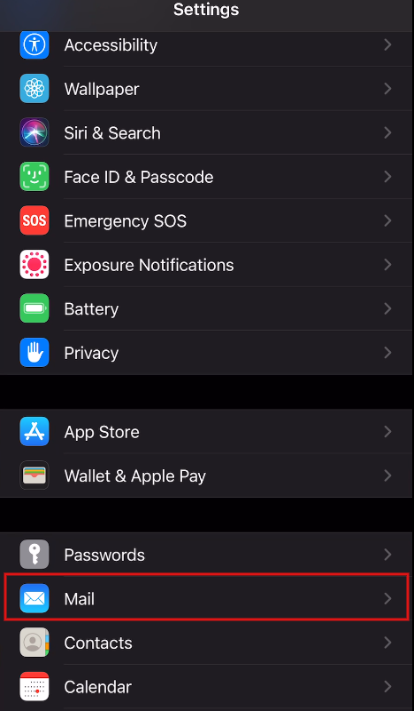
1. Open the Settings app on your device
→ Tap Mail

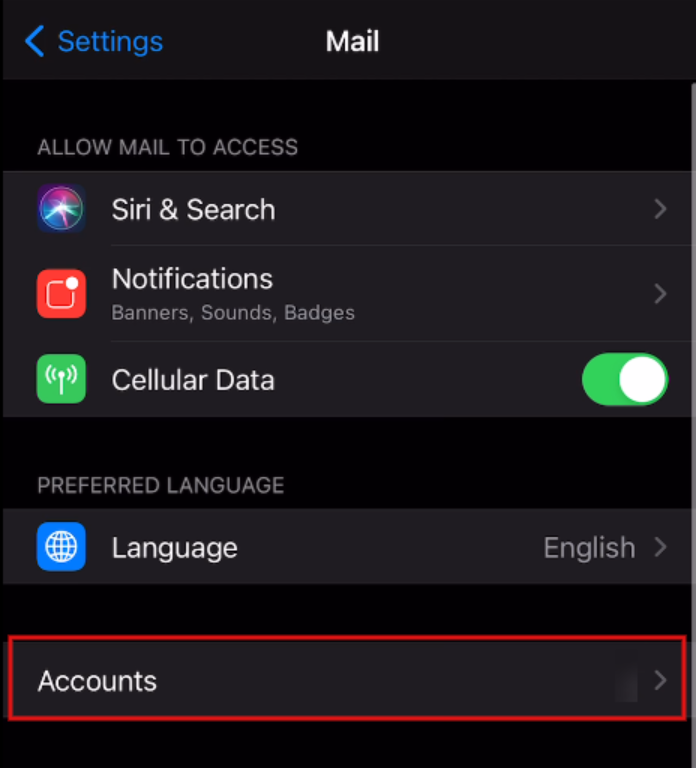
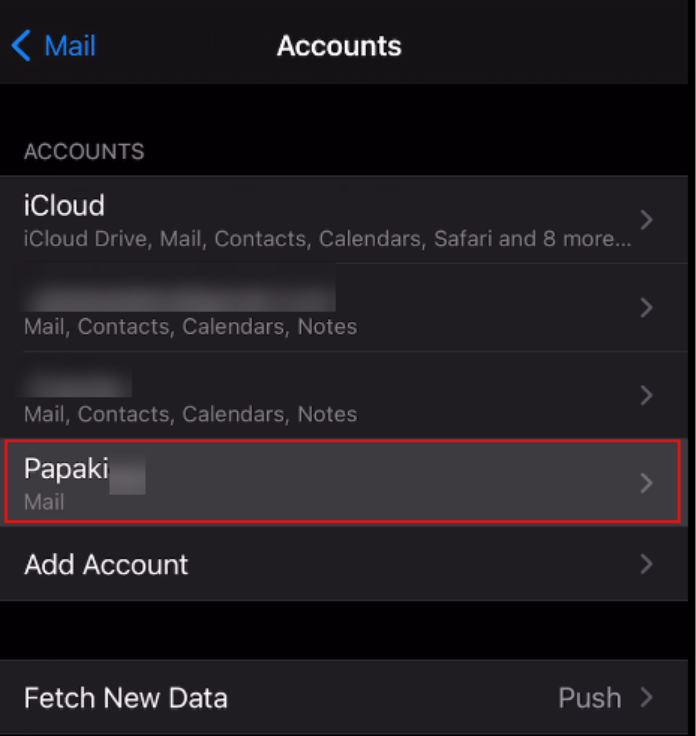
2. Select Accounts → Tap Add Account
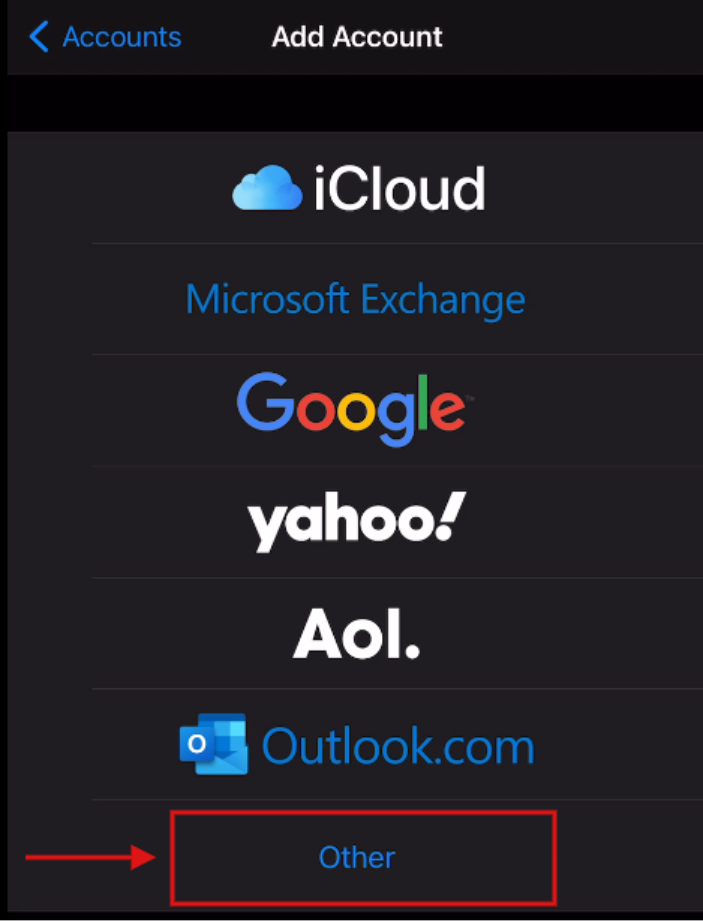
3. Choose Other → Then tap Add Mail Account
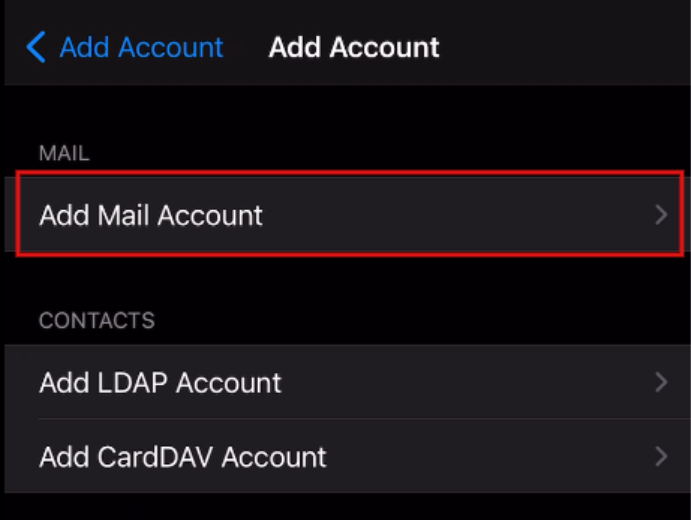
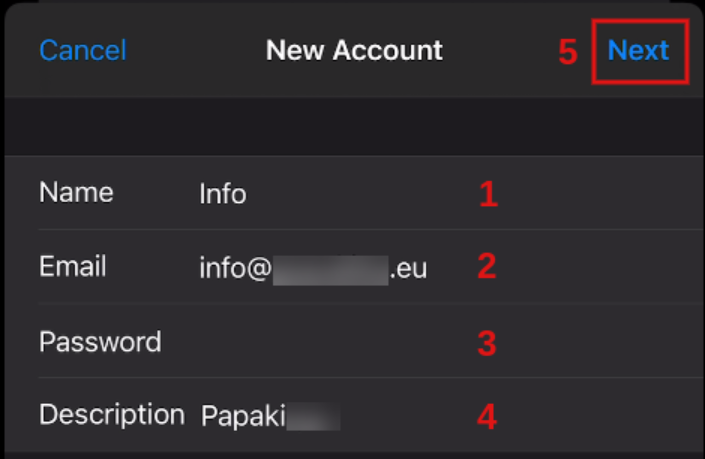
- Fill in your email details:
- Name: Your display name
- Email: Full email address (e.g., info@yourdomain.tld)
- Password: Your email password
- Description: A label to identify this account on your device
- Tap Next
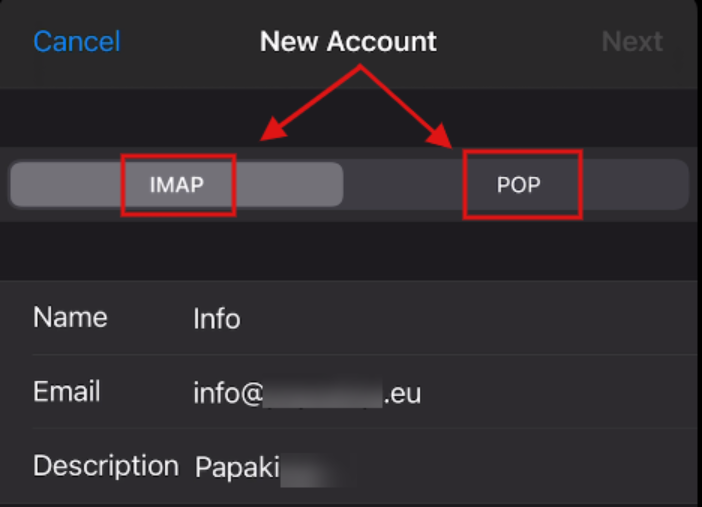
5. Choose IMAP (recommended) or POP as the account type
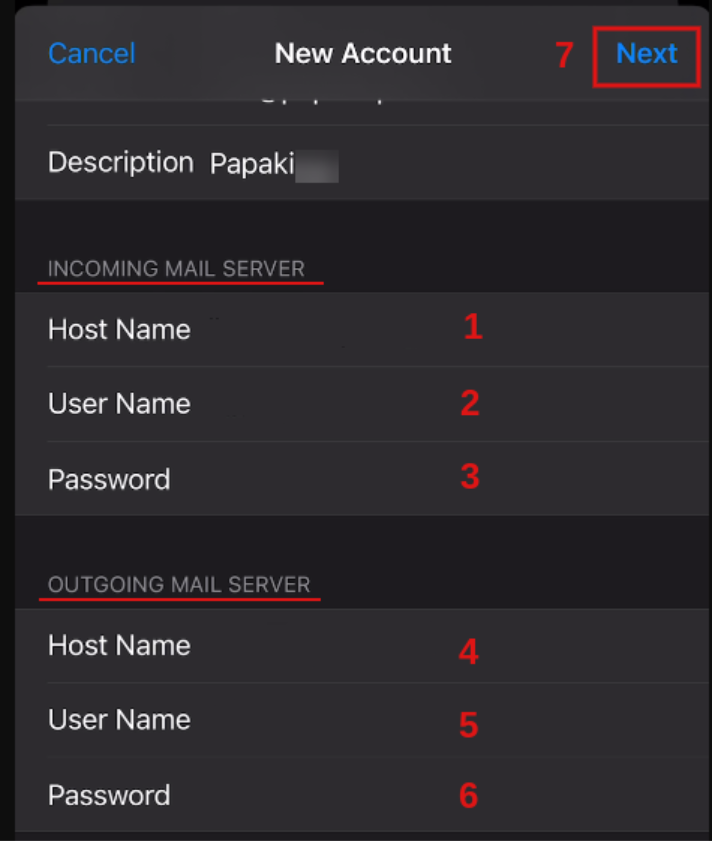
6. Configure the server settings:
Incoming Mail Server (IMAP)
- Host Name:
- mail-gr.securemail.pro (for new Papaki environment)
- or your Plesk hostname (for old Papaki environment - without :8443)
Read more here.
- Username: Full email address
- Password: Your email password
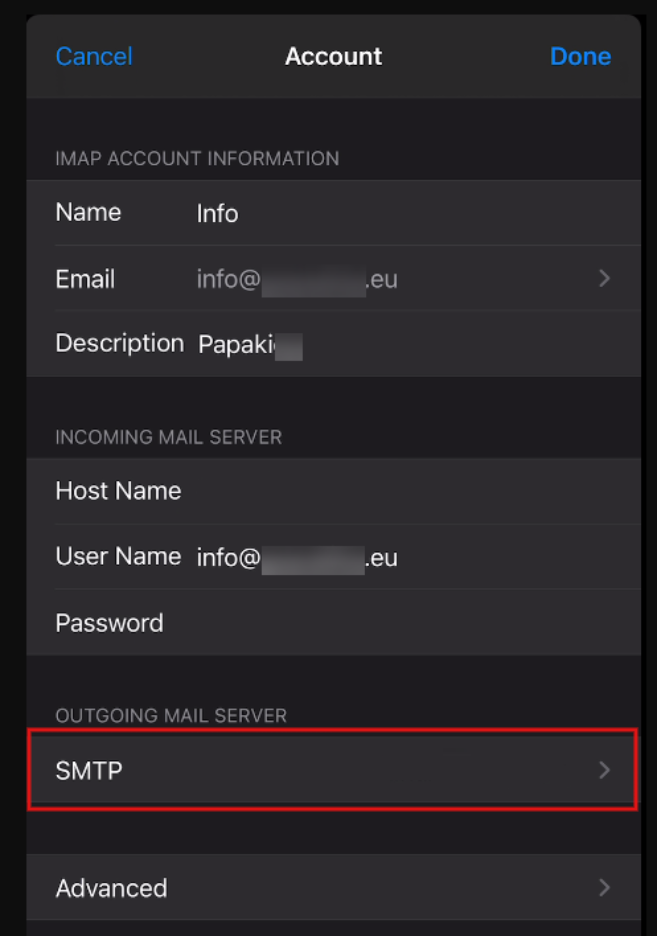
Outgoing Mail Server (SMTP)
- Host Name:
- smtp-gr.securemail.pro (for new Papaki environment)
- or your Plesk hostname (for old Papaki environment - without :8443)
Read more here.
- Username: Full email address
- Password: Your email password
- Tap Next
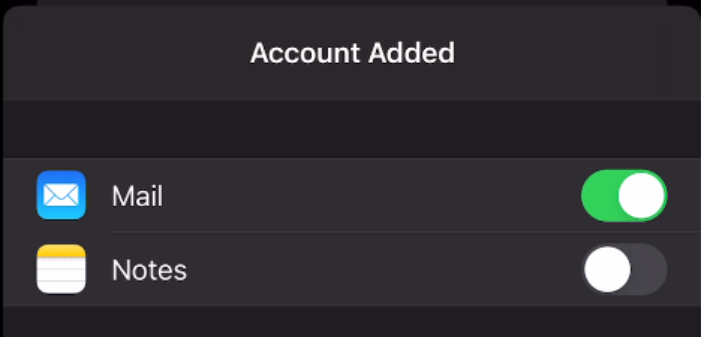
7. If all details are correct, a confirmation screen will appear.
Choose which apps to sync (e.g. Mail, Notes), and tap Save
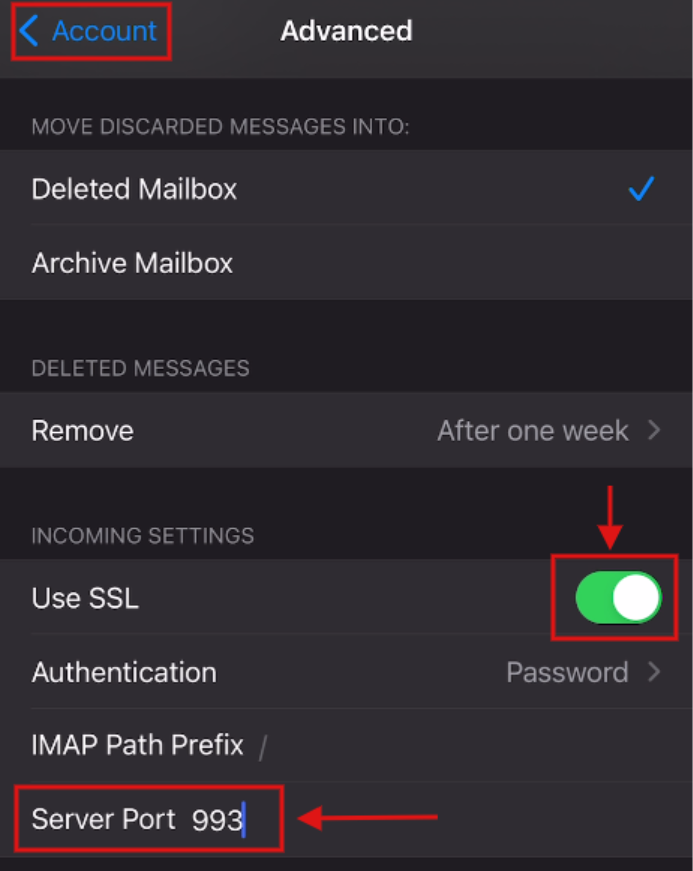
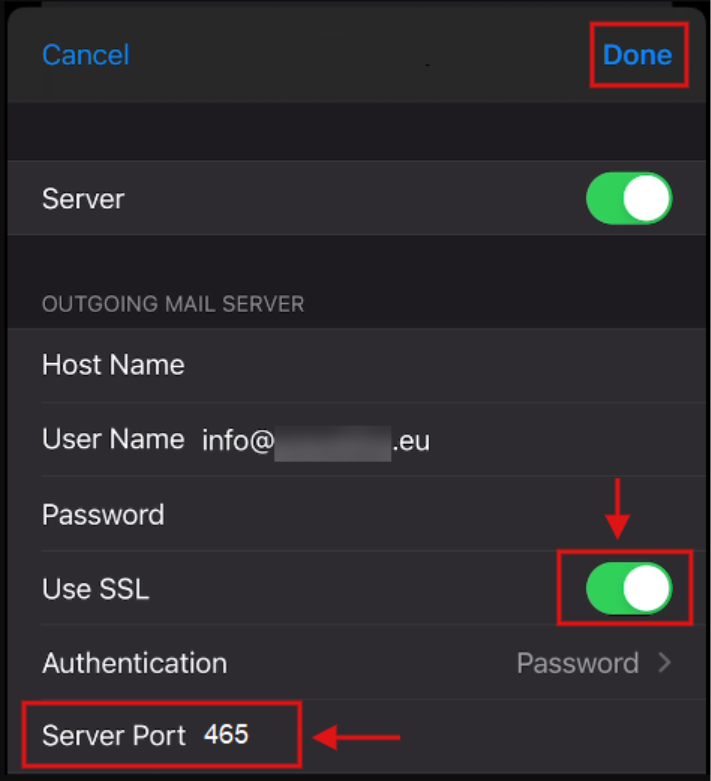
Set Secure Ports (SSL)
8. Go to:
Settings > Mail > Accounts > [Your Account] > Advanced
- Use SSL: Enabled
- Incoming Server Port: 993 (IMAP) or 995 (POP)

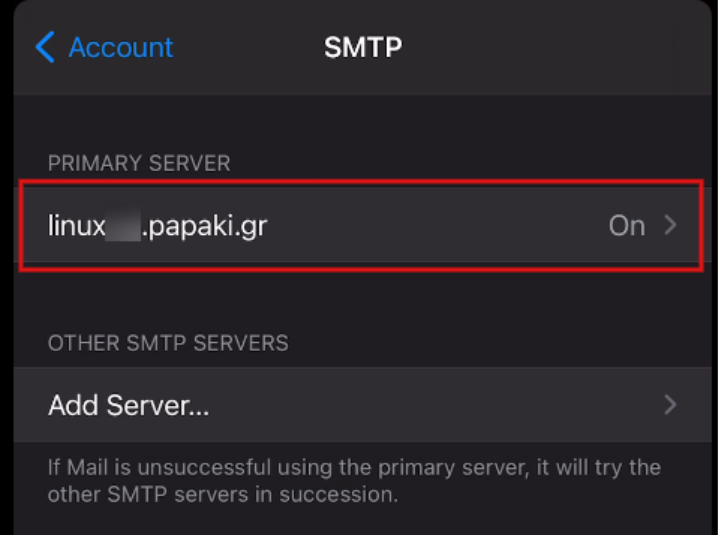
Return and tap SMTP → Select your mail server:
- Use SSL: Enabled
- Outgoing Server Port: 465 (SSL) or 587 (TLS)
- Tap Done
Where to find your mail servers
If your email is hosted on the Papaki 2.0 control panel:
- Incoming mail server: mail-gr.securemail.pro
- Outgoing mail server: smtp-gr.securemail.pro
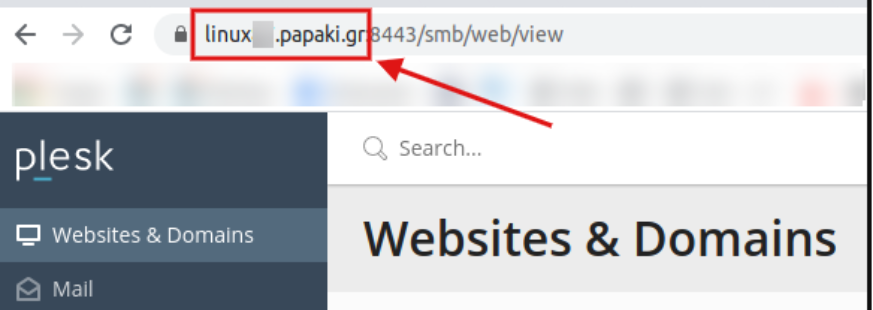
If hosted on the Plesk environment (Papaki 1.0):
- Find the server's name in the browser's address bar when logged into Plesk
- Do not include the port: 8443
Frequently Asked Questions (FAQs)
I can receive emails, but I can’t send. What should I do?
Make sure you have selected the correct outgoing mail port (465 or 587) and that SSL is enabled.
Why are my emails going to spam?
Ensure that SPF, DKIM, and DMARC records are properly configured for your domain and that you are using Papaki’s official SMTP server
How many email accounts can I create?
You can create as many email accounts as you need—Papaki imposes no limitation.
How can I test if my email works before adding it to my device?
You can first test it via webmail. Depending on the infrastructure hosting your email package, the webmail URL may vary.
What should I do if the connection fails?
Remove the account and add it again, ensuring all details are correct. If the issue persists, try using a different network (e.g., mobile data) or enable a VPN.
You haven't found what you are looking for?
Contact our experts, they will be happy to help!
Contact us