
Customer Support
How do I add Nameservers to my domain?
Updating the nameservers (also known as DNS name servers) is necessary when you want your domain to point to a different hosting provider or DNS service. This ensures that your website and services are correctly linked to the server that hosts them.
You can easily manage your domain’s nameservers through your Papaki control panel by following the steps below.
What Are Nameservers?
Nameservers act as a bridge between your domain name and the hosting server where your website files or services reside. They are typically set in pairs (e.g. ns1.example.com and ns2.example.com) and link to specific IP addresses corresponding to the destination server.
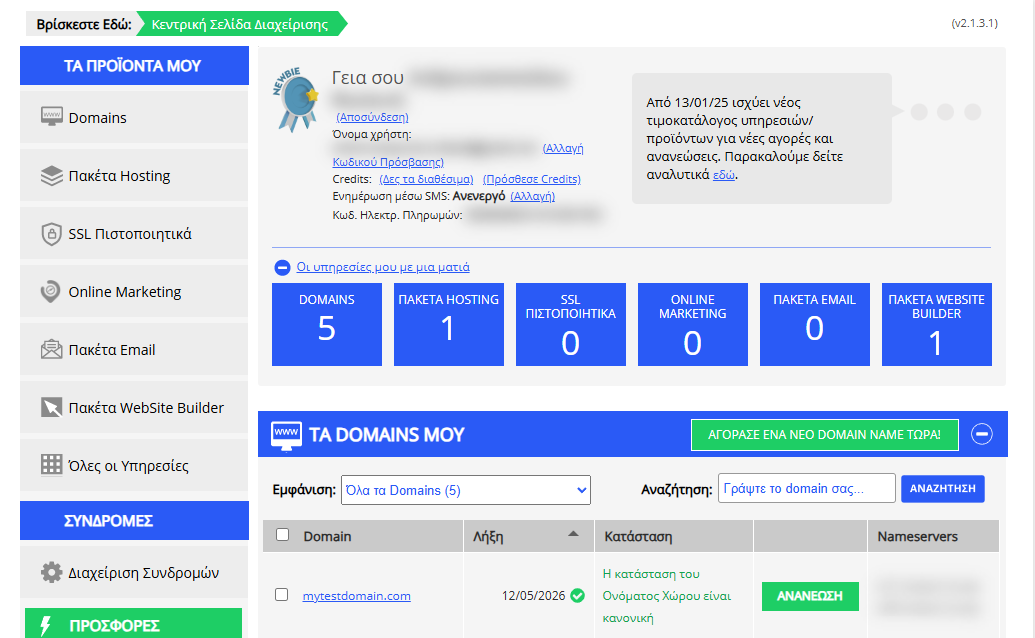
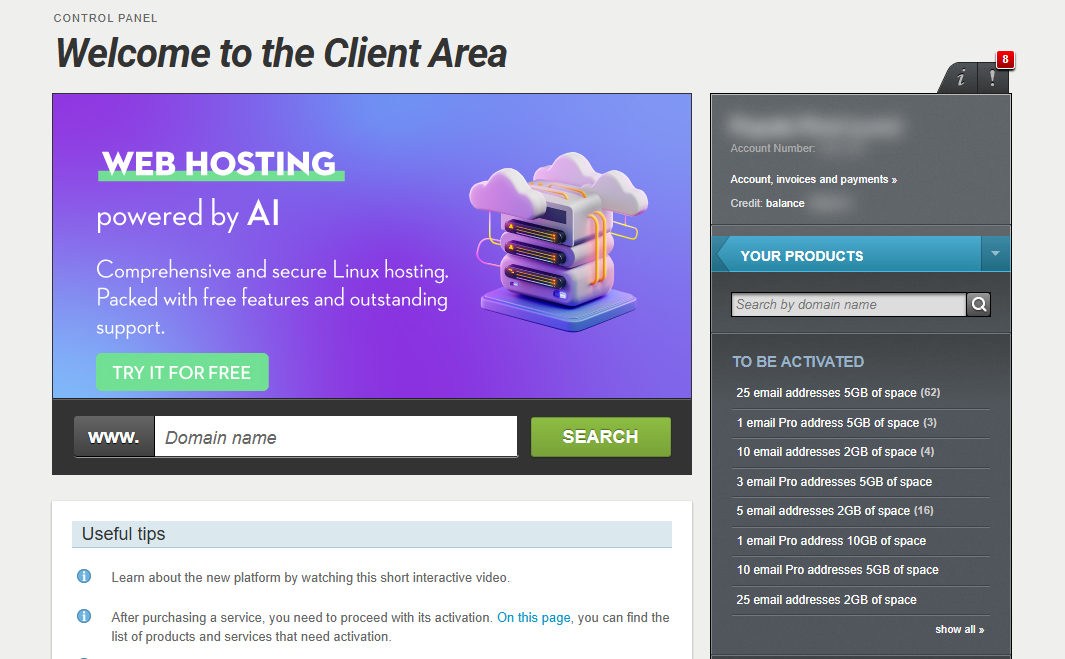
[Papaki 2.0]
Step-by-Step Guide
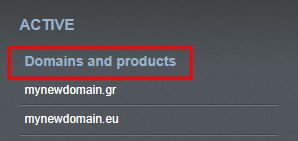
- In the right-hand side menu, go to Domains and products, and select the domain you wish to manage.
- Choose Domain & DNS.
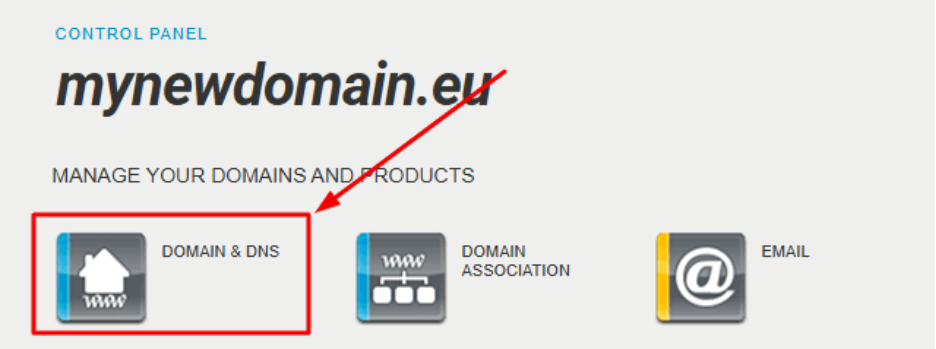
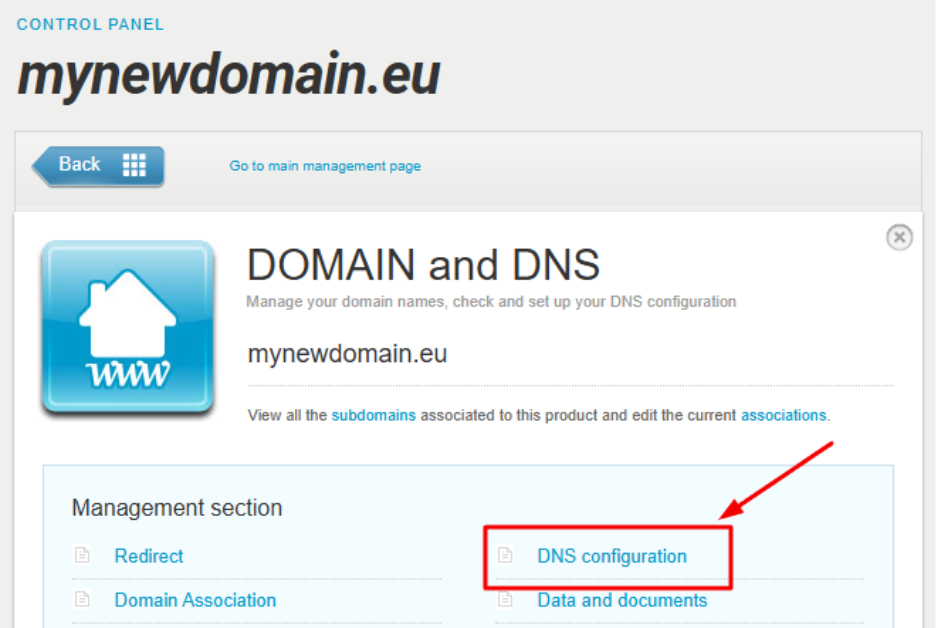
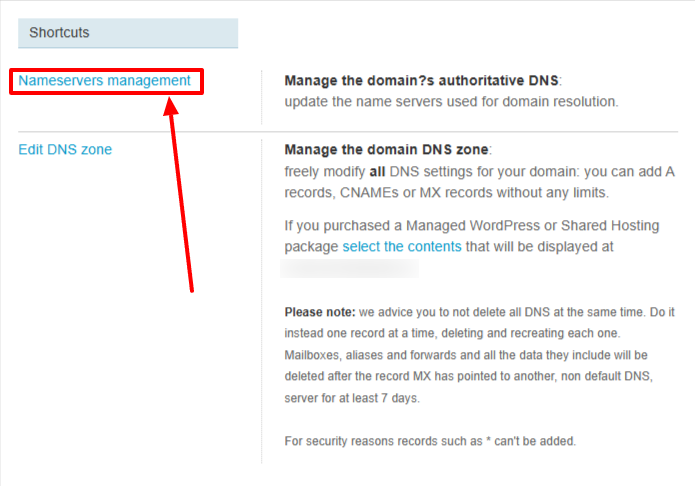
- Click on DNS Configuration, and then select Start DNS Modification from the shortcuts.
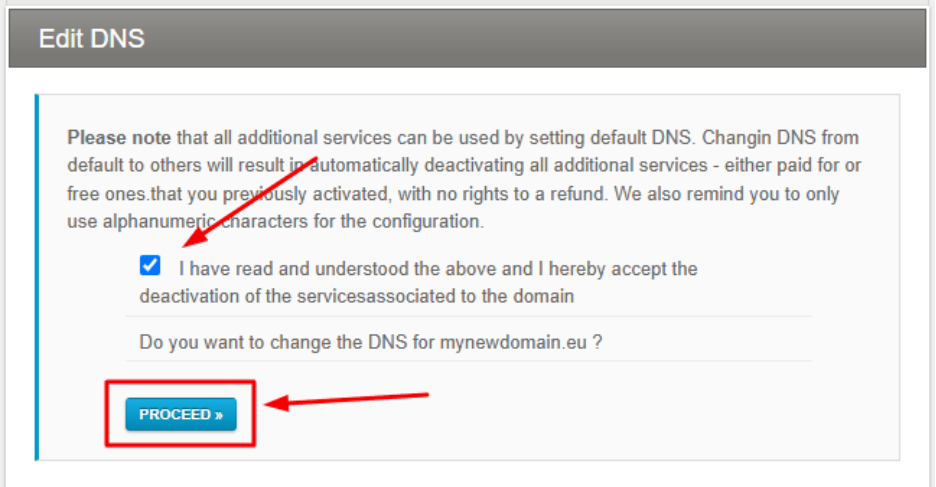
- Carefully read the warnings regarding the consequences of changing nameservers. Click Proceed.
- You’ll now see the current nameservers. Under Select a configuration, choose one of the following:
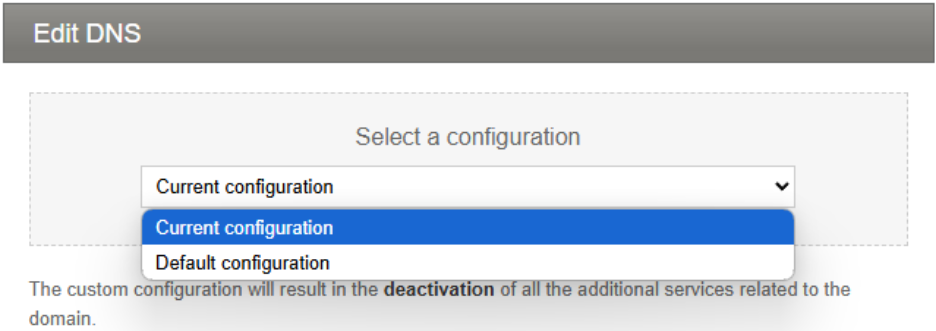
a. Current Configuration
Enter the new nameservers provided by your hosting or DNS service (e.g., Cloudflare). You may also be required to input corresponding IP addresses if requested.
b. Default Configuration
Revert to Papaki’s default nameservers:
- dns1.papaki.gr
- dns2.papaki.gr
This option enables Papaki’s free DNS management and email service.
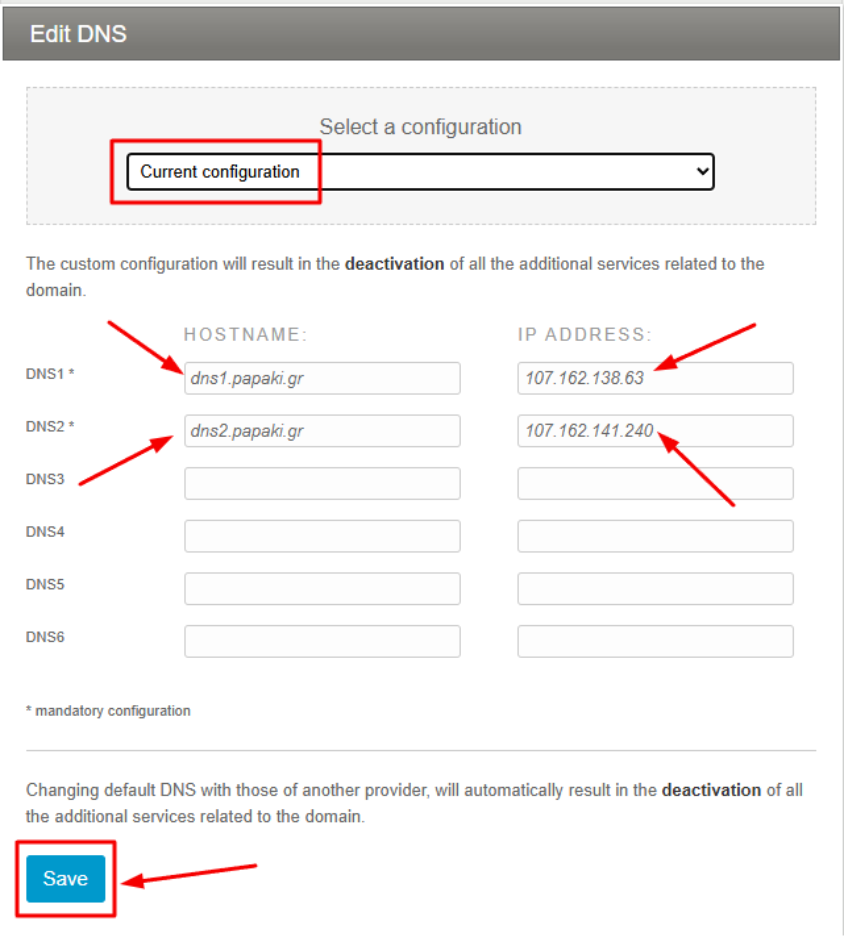
- Click Save to apply the changes.
Note: It may take up to 48 hours for changes to propagate across all internet service providers (ISPs).
Using an External DNS Service
If you would like to use an external DNS service (other than the free DNS service provided by Papaki), you can set your own nameservers.
What you need to do
- Enter the nameservers of your choice in the corresponding fields
- Add the relevant IP addresses (IPs)
If you don’t know the IP addresses
If you are not aware of the IPs:
- you can enter indicative values (e.g. 1.1.1.1)
- the IP verification is performed automatically by the system at a later stage
Attention
- Entering temporary or incorrect IP addresses will not cause any issues
- The only requirement is that the nameservers you define are valid and functional
Important Notes
- You can update your nameservers at any time directly from your Papaki control panel.
- DNS Propagation time depends on your ISP's cache refresh policy and usually takes between 4 and 48 hours.
- During this period, services linked to your domain (e.g., your website or email) may not function properly.
- Some domain extensions (TLDs) may have unique requirements or limitations regarding valid nameservers.
- When you first register a domain with Papaki, the default nameservers (dns1.papaki.gr, dns2.papaki.gr) are automatically set, activating the free email and DNS services.
- If you are using DNSSEC, key management is handled via:
Domains & DNS → DNSSEC Key Manager
Troubleshooting: Why Can’t I Update My Nameservers?
- Locked Domain:
If your domain is locked, you must unlock it before updating nameservers. Learn more here. Domain locking does not apply to all extensions — for example, .gr domains are exempt.
Attention!
If you are using the free email service provided with your domain by Papaki, please note the following:
When you change your nameservers and stop using Papaki’s free DNS service, then:
- The free email service will be automatically deactivated.
- All email content (messages, folders, etc.) will be permanently deleted within 7 days of the change.
Make sure to back up or migrate your email data before proceeding with the change to avoid losing valuable information.
[Papaki 1.0]
If you want to add the Nameservers of your hosting plan to your domain at Papaki, follow these simple steps below:
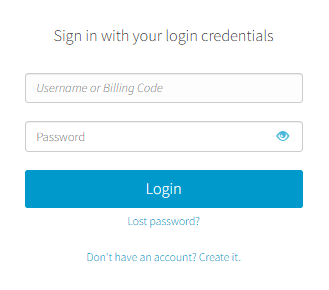
- Log in to your Papaki account.
Forgot your password? See here how to recover it. If it's your first login attempt to the new Papaki panel, please read more here.
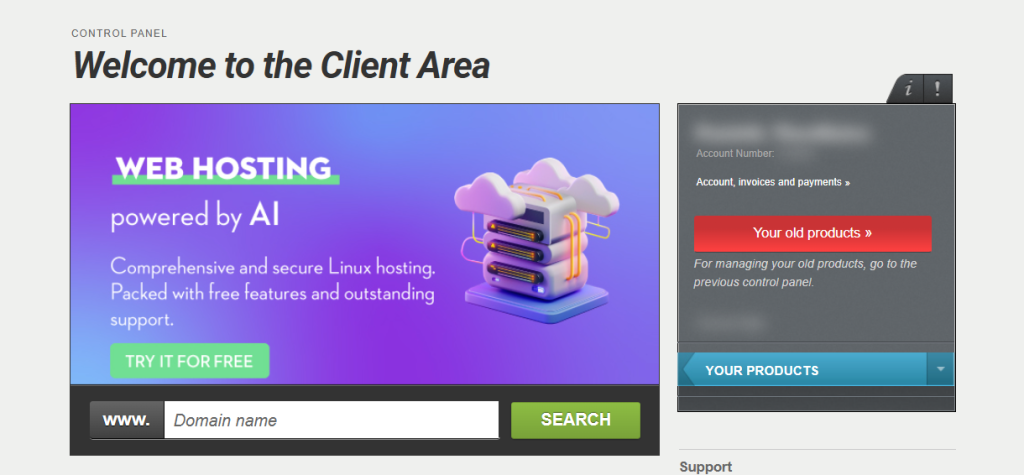
- Click the red button Your old products » on the right side of the control panel to access the old Papaki panel.
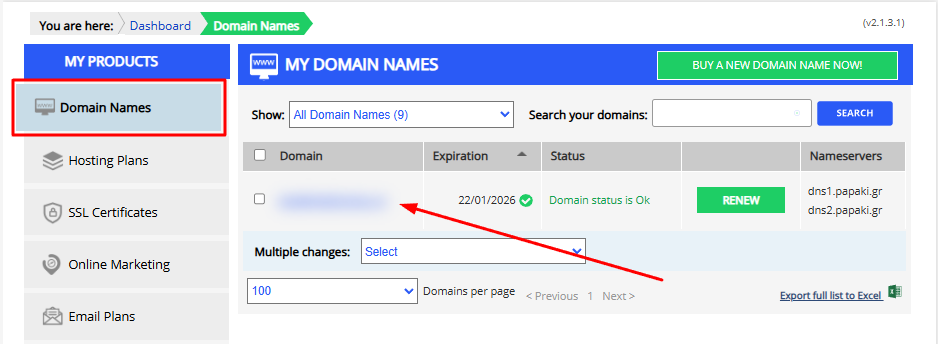
- Click on the domain you want to manage.
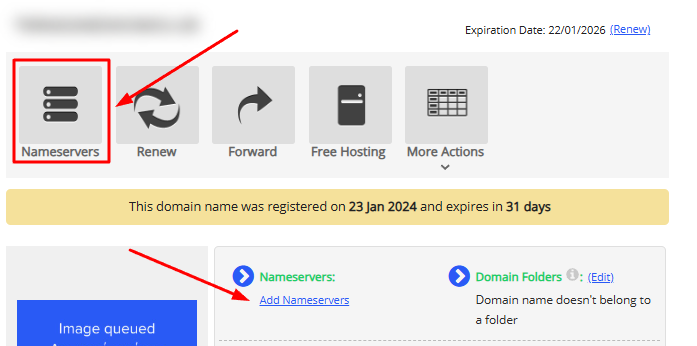
- Click on the Nameservers tab. Alternatively, click Add Nameservers.
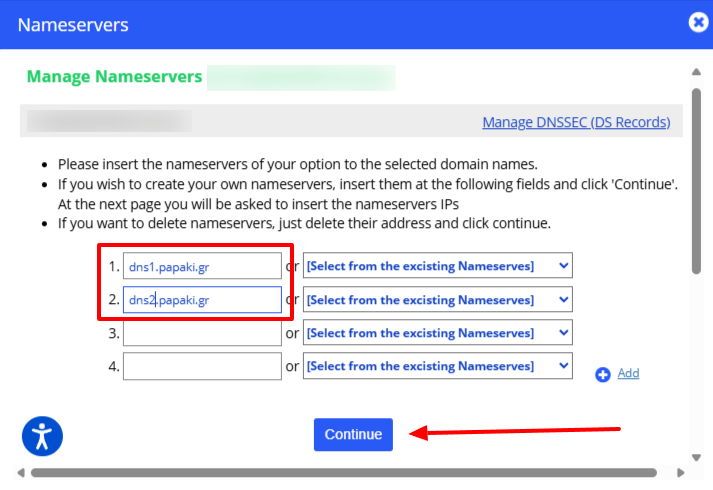
- Enter the nameservers you wish to use and click Continue.
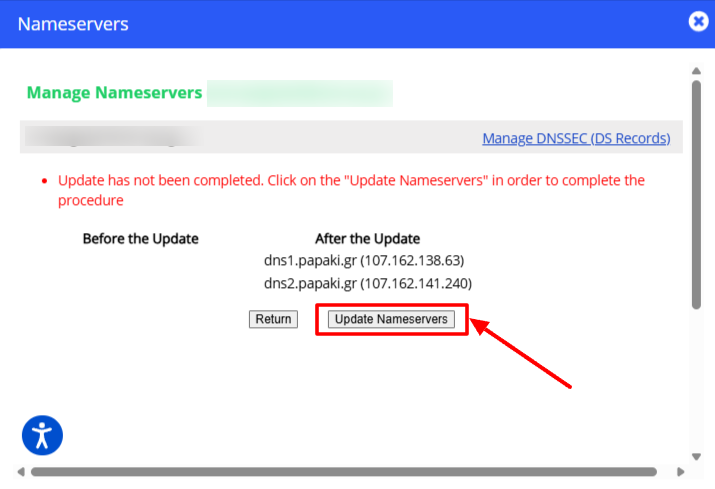
- Click on Update Nameservers.
Tip: Always remember that you need to wait for 4-48 hours from the moment you insert the nameservers, in order for your ISP to update its records. This period depends solely on the provider and not Papaki.
You haven't found what you are looking for?
Contact our experts, they will be happy to help!
Contact us