
Customer Support
How to create a workflow in Flexmail
Workflows allow you to automate communication with your contacts by performing specific actions when predefined conditions are met.
Before creating your first workflow, it is recommended to plan the automation logic, define the triggers that will be used, and prepare the email messages that will be sent.
Before you begin
Make sure that:
- you have access to Automation → Workflows
- you have planned the workflow steps and conditions
- all email messages that will be used have already been created in Campaigns → Messages
Creating a New Workflow
- Go to Automation → Workflows.
- Click Add New Workflow.
- Enter a name and category for the workflow.
- Select a predefined template or choose Custom Workflow to build it from scratch.
- Click Add.
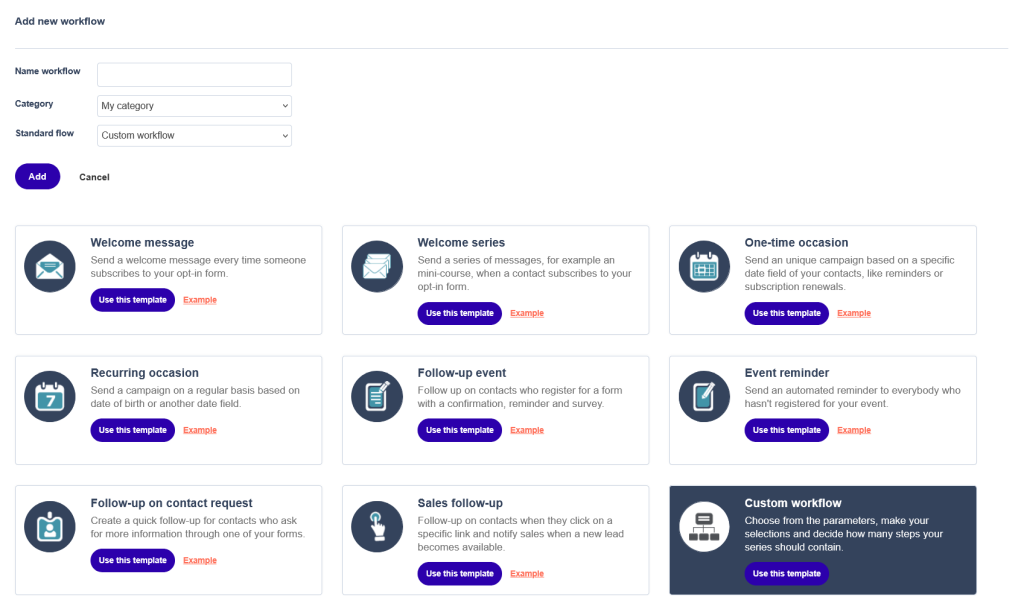
Predefined templates include ready-made automation flows for common scenarios such as welcome emails and follow-up campaigns.
Configuring the Start Block
Every workflow begins with a Start Block, which determines which contacts will enter the workflow and when.
- Click the Start Block.
- Select the trigger that will activate the workflow.
- Depending on the trigger, choose the relevant form, campaign, interest, or contact field.
- If you want existing contacts that already meet the conditions to enter the workflow, enable Include all contacts that already meet this condition.
- Add additional AND or OR conditions if needed.
- Click Save.
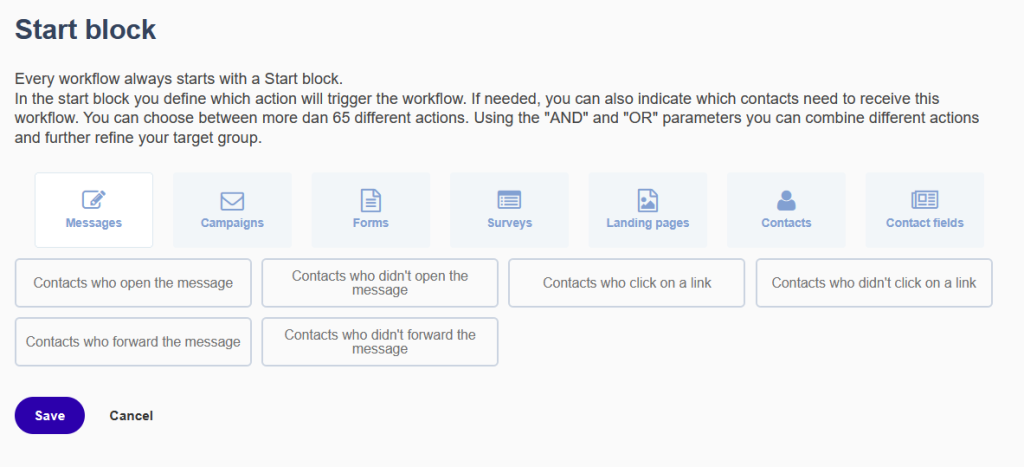
Examples of triggers:
- Contacts who subscribed through a form
- Contacts who clicked a link in an email
- Contacts matching a specific date or contact field value
Adding Blocks to the Workflow
Once the Start Block is configured, you can add additional steps by clicking the + icon below any block.
Send Campaign
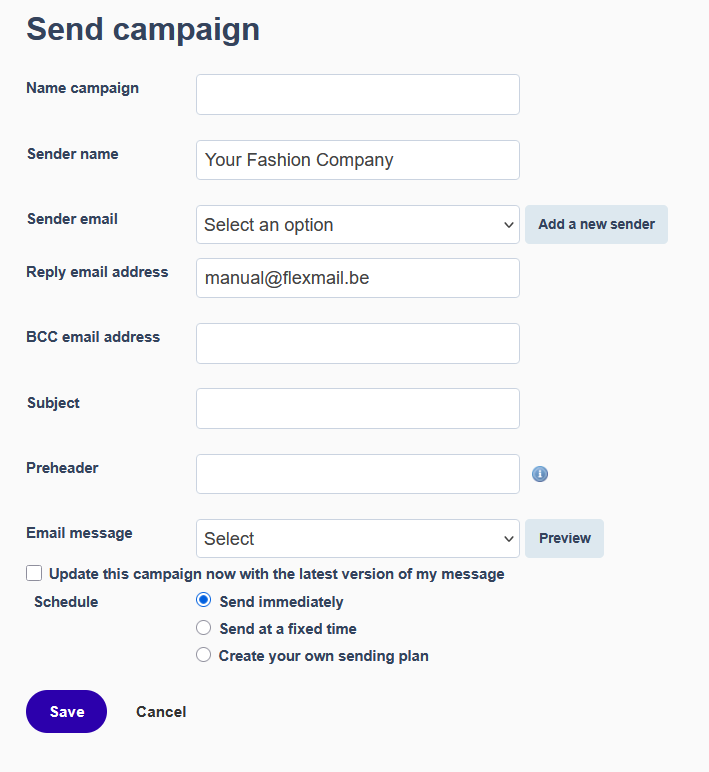
The Send Campaign block is used to send emails within the workflow.
To configure it:
- Click + and select Send Campaign.
- Enter the sender details.
- Select the email message you want to send.
- Configure the sending schedule:
- immediately
- at a specific time
- on specific days and times
- Click Save.
Internal Notification
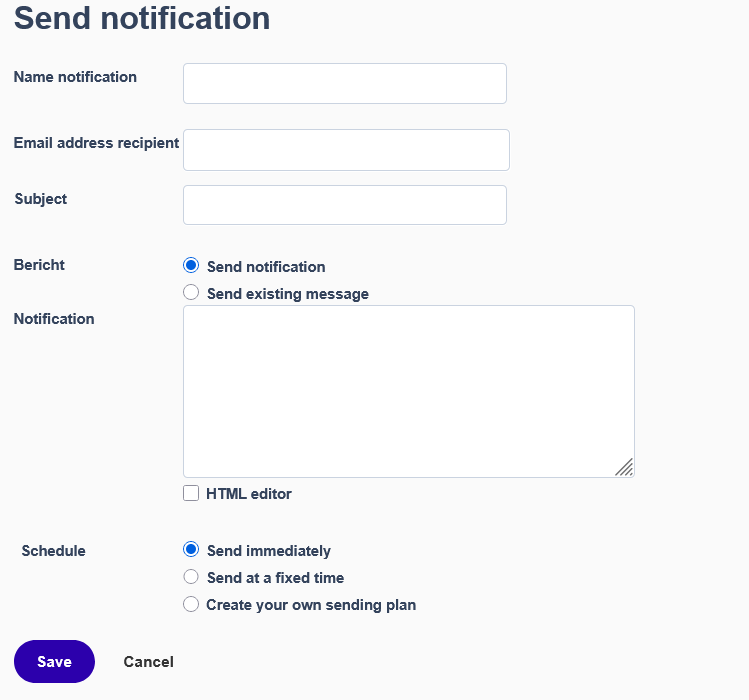
The Internal Notification block is used to send notifications to your team.
For example, a notification can be sent when:
- a form is submitted
- a contact clicks a link
- a specific action is performed by a contact
Configuration:
- Click + and select Internal Notification.
- Complete the following information:
- Recipient email address
- Subject
- Notification content
- Define the sending time.
- Click Save.
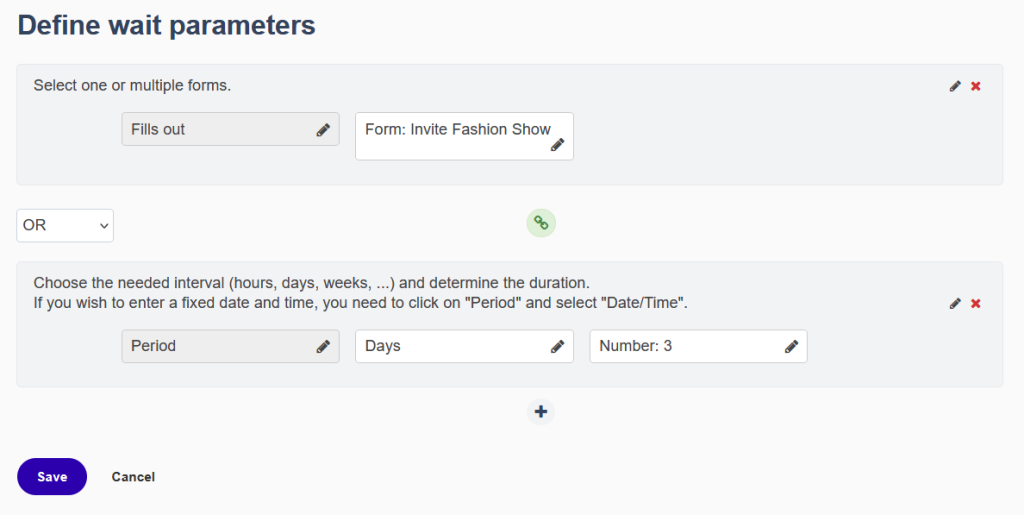
Wait Block
The Wait Block adds delays between workflow actions.
You can choose:
- a fixed waiting period (minutes, hours, days, or weeks)
- waiting until a specific condition is met
To configure it:
- Click + and select Wait.
- Choose the wait type.
- Define the duration or condition.
- Click Save.
If / Else
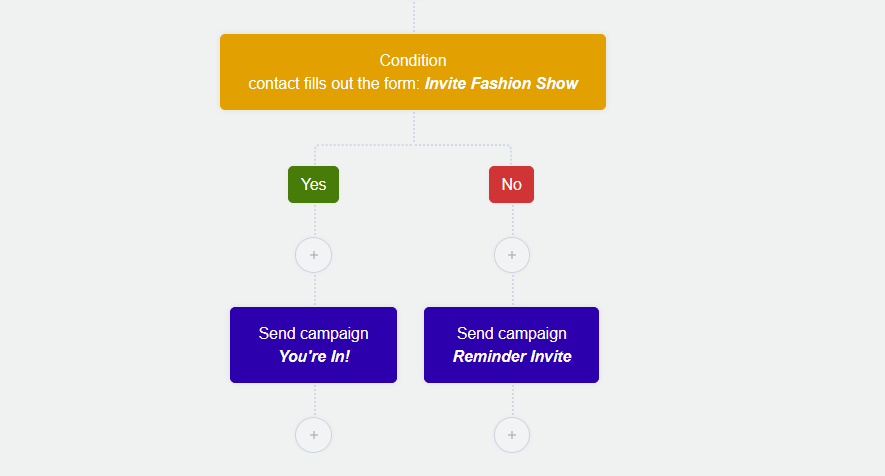
The If/Else block allows you to create different workflow paths based on a contact's behavior or characteristics.
- Click + and select If/Else.
- Define the condition.
- The workflow will create two branches:
- Yes (the condition is met)
- No (the condition is not met)
- Add the appropriate blocks to each branch.
Contact Actions
Contact Actions allow you to perform actions directly on contacts.
Available actions include:
- Add to Interest
- Remove from Interest
- Update Contact Details
- Delete Contact
- Add to Blacklist
To configure a Contact Action:
- Click +.
- Select the desired action.
- Enter the required information.
- Click Save.
Activating the Workflow
Once all blocks have been configured:
- Review the entire workflow.
- Make sure every branch leads to a subsequent step.
- Click Start Workflow.
Once activated, contacts who meet the Start Block criteria will automatically enter the workflow.
Useful Tips
- Use descriptive workflow names so they are easy to identify later.
- Test workflows with internal test contacts before activating them.
- Monitor workflow performance during the first few days after activation.
- Make sure that all emails used in Send Campaign blocks are fully completed before activating the workflow.
Read more here: Flexmail Knowledge base
Common Mistakes
- Activating a workflow before the email messages are finalized.
- Creating If/Else branches without adding follow-up actions.
- Forgetting to enable Include Existing Contacts when existing contacts should participate in the workflow.
- Activating a workflow without testing it first.
You haven't found what you are looking for?
Contact our experts, they will be happy to help!
Contact us