
Customer Support
How to import contacts in Flexmail
Before you can send email campaigns, you need to add contacts to your Flexmail account. The fastest way to do this is by importing a CSV file. During the import process, Flexmail validates the data and may reject contacts that do not meet certain requirements.
Before you begin
Make sure that:
- you have created any custom fields you want to use
- your contact file is in CSV format
- you have documented permission to contact the imported contacts
- if you are migrating contacts from another platform, you have first imported unsubscribed contacts into the Flexmail blacklist
Import contacts using a CSV file
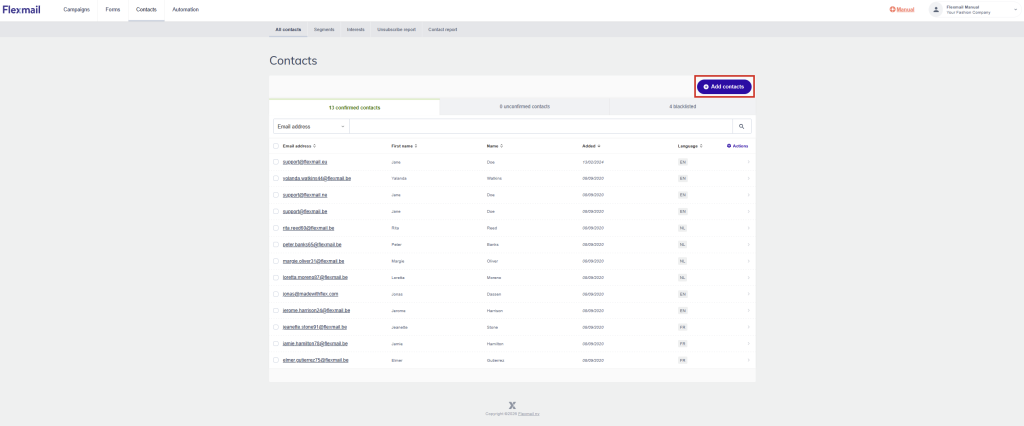
- Go to Contacts → All contacts.
- Click Add contacts.
- Select Upload a file and upload your CSV file.
- Flexmail will analyze the file and display a preview of the data.
- Map each column in your file to the corresponding Flexmail field.
- Select or create a Source for the import.
- Select a default language for contacts that do not have a language specified in the file.
- Confirm that you have the right to contact these recipients.
- Review the import summary.
- Click Import to start the import process.
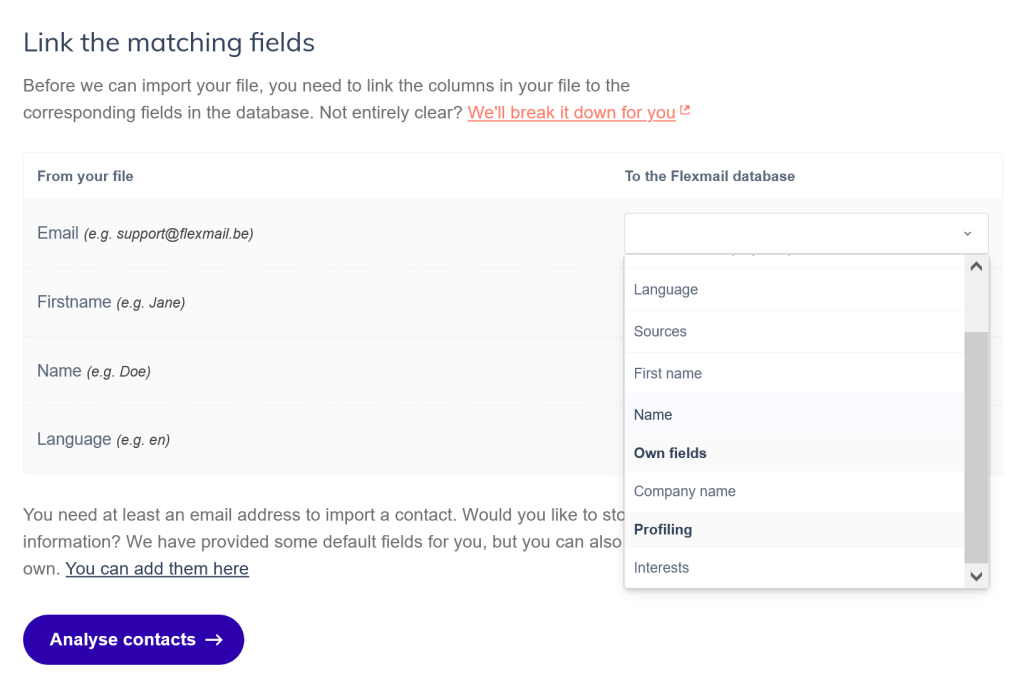
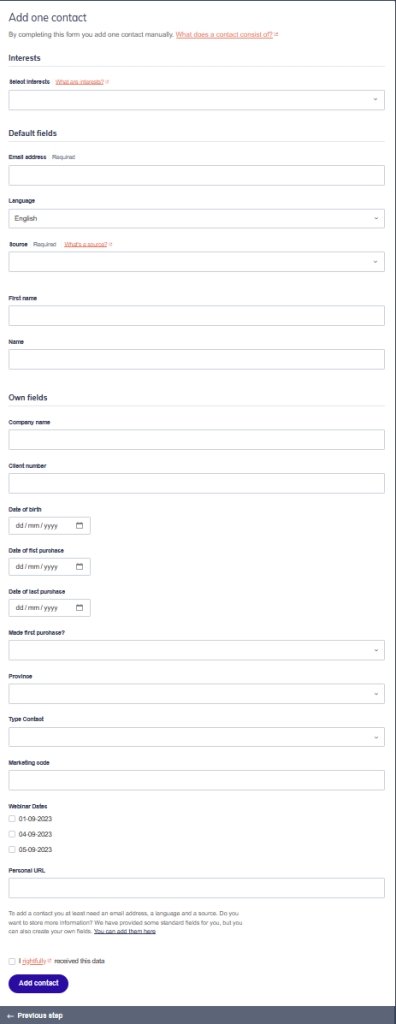
If needed, you can also manually add contacts one at a time. Enter at least the contact's email address and add any additional information you want to store. You will also need to assign a Source to the contact.
CSV file requirements
The file you import must meet the following requirements:
- file format: .csv
- maximum file size: 25 MB
- maximum number of rows: 100,000
- the first row must contain column headers
- if a field contains multiple values, they must be separated by commas
What happens to existing contacts?
If an email address already exists in Flexmail, a new contact record will not be created. Instead, Flexmail updates the existing contact record with the information included in the import file.
Why were contacts rejected during import?
During the import process, Flexmail performs validation checks and may reject contacts to maintain data quality and protect email deliverability.
Common reasons for contact rejection
- Invalid email address: A contact may be rejected when:
- the email address contains formatting errors
- the domain no longer exists
- the mailbox no longer exists
- The contact is on the blacklist: Email addresses that already exist on the blacklist cannot be imported again as active contacts. Flexmail will display these as errors in the import summary.
- The address has generated a Hard Bounce: A hard bounce means the email could not be delivered and is unlikely to be delivered successfully in the future.
Common reasons include:
- the email address does not exist
- the domain does not exist
- the receiving mail server permanently rejected the message
For example, when the error code 5.1.1 (email address does not exist) is returned, Flexmail automatically adds the address to the blacklist.
- Import file errors: Contacts may also be rejected because of:
- incorrect CSV formatting
- missing required information
- incorrect field mapping during import
How can I see why a contact was rejected?
After the import is completed, Flexmail provides a detailed summary showing:
- successfully imported contacts
- updated contacts
- warnings and errors identified during the import
You can also download the error file to review which records were rejected and the reason for each rejection.
Important note
It is not recommended to remove addresses from the blacklist and re-import them if they have generated a hard bounce. Repeatedly sending emails to invalid addresses can negatively affect your sender reputation and email deliverability.
You haven't found what you are looking for?
Contact our experts, they will be happy to help!
Contact us