
Customer Support
How to migrating Free Hosting from Papaki 1.0 to Papaki 2.0
In this guide, you will learn step by step how to transfer your website content from a free hosting package on Papaki 1.0 to a new free hosting package on Papaki 2.0.
With every domain you manage through Papaki, we provide you with a 500MB hosting package (Microhosting), where you can install WordPress and create your website. If you wish to transfer the content of your static website from the free hosting package you maintain in the old Papaki Control Panel to the Free Microhosting, follow the guide below.
1. Create a Website Backup (Papaki 1.0)
- Log in to your Papaki account.
Forgot your password? See here how to recover it. If it's your first login attempt to the new Papaki panel, please read more here.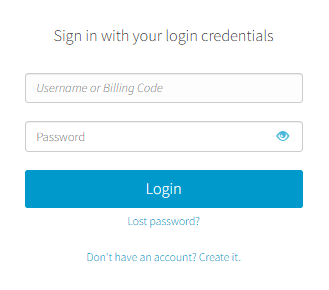
- Click the red button Previous client area » on the right side of the control panel to access the old Papaki panel.
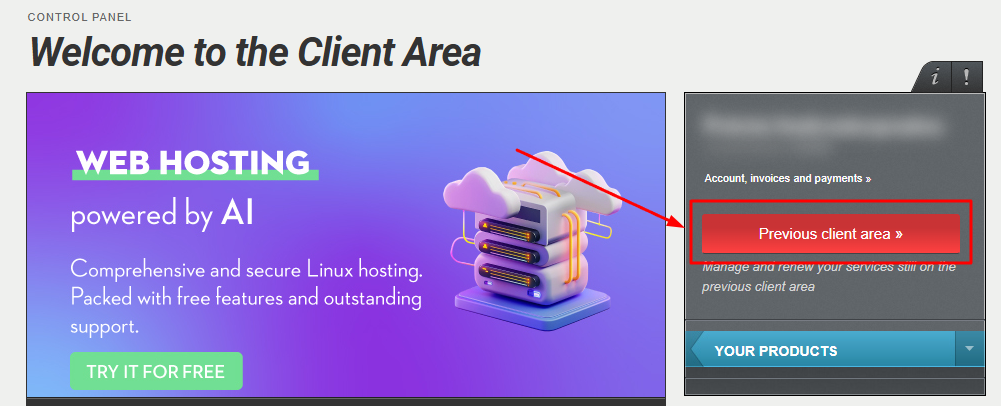
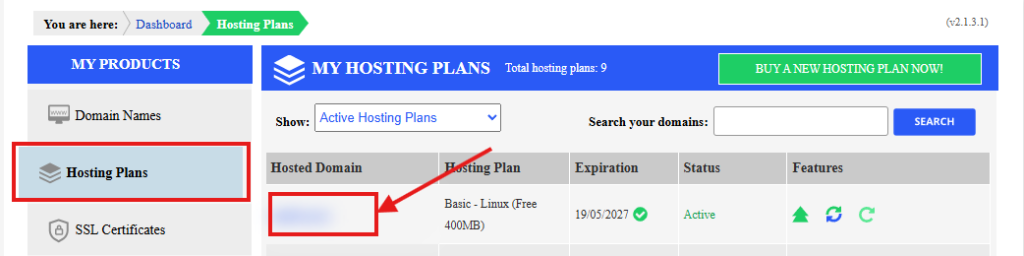
- Select the hosting package you want to transfer.
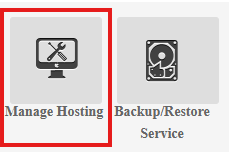
- Click “Manage Hosting” to access the Plesk panel.
- Navigate to the “Files” tab.
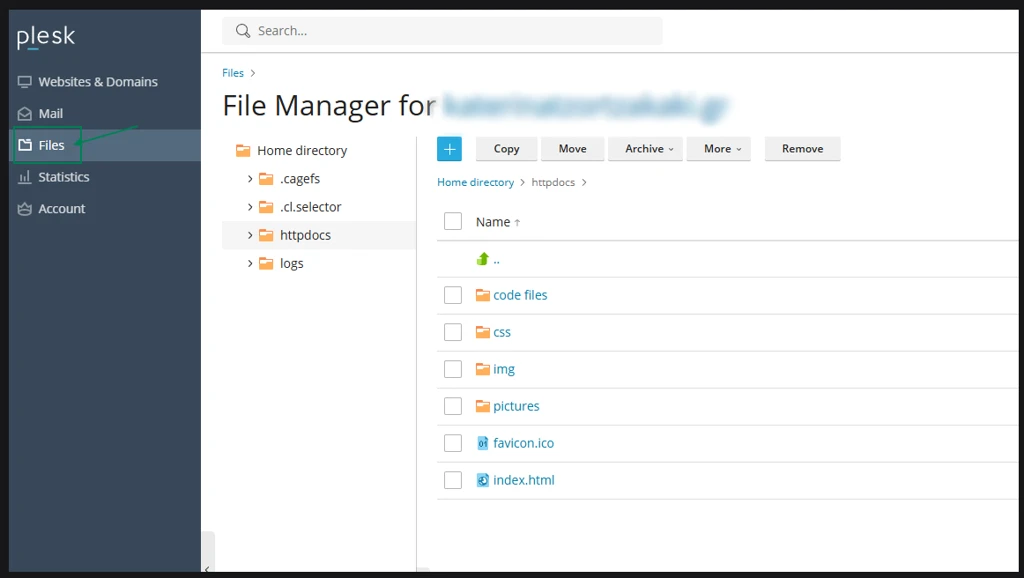
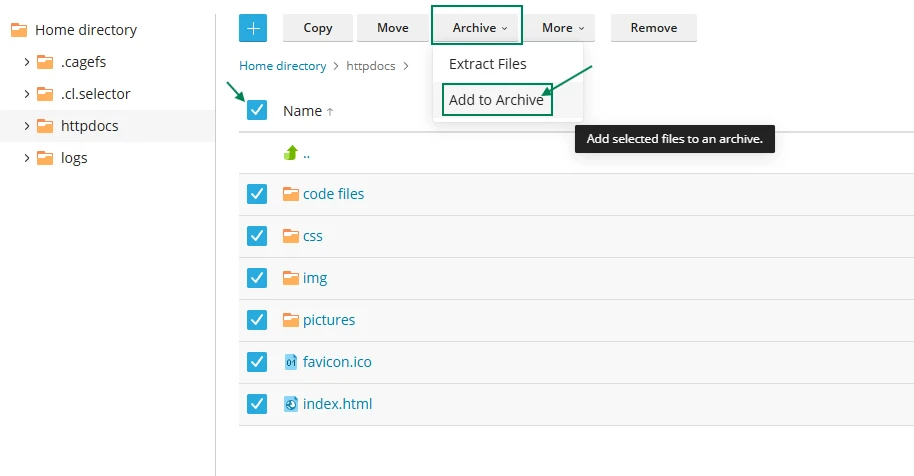
- Select all your website files. From the “Archive” option, click “Add to Archive”.
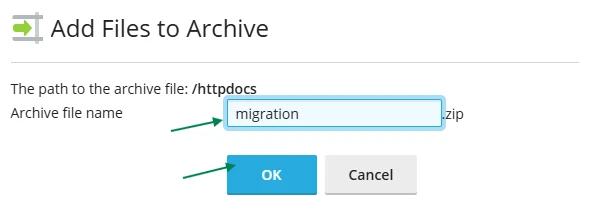
- Name your backup file and click “OK”.
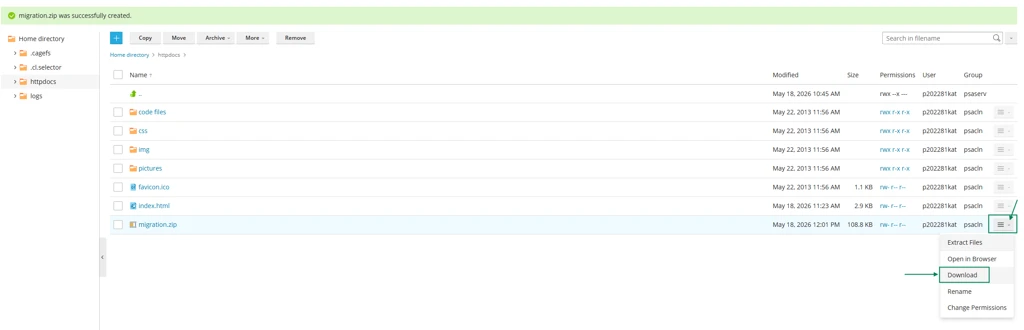
- Once the backup is created:
- Select the archive file
- Click “Download” to save it locally
Tip: Make sure the archive includes all folders (such as /httpdocs or /www).
2. Prepare Hosting on Papaki 2.0
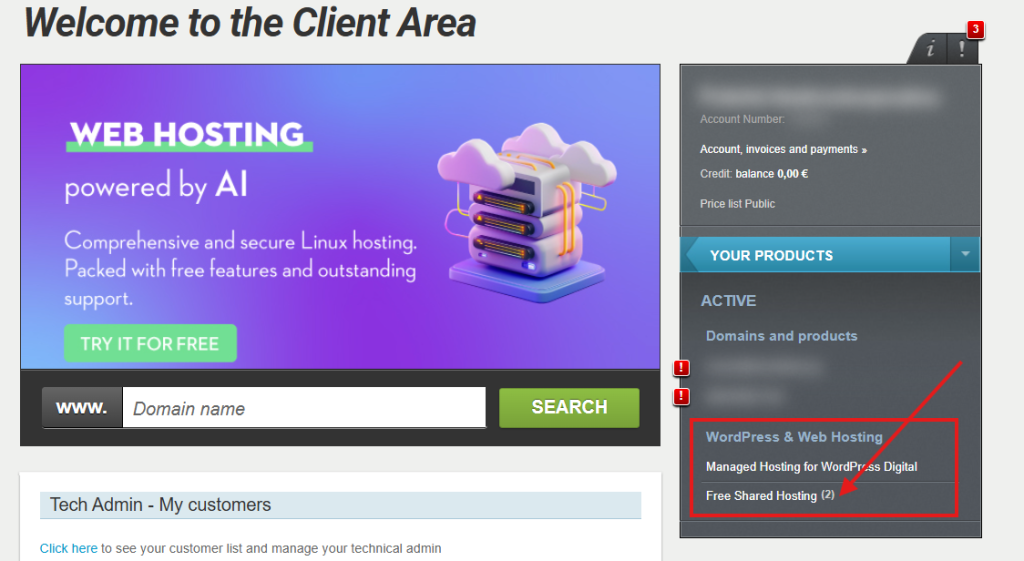
- Log in to your Papaki account.
Forgot your password? See here how to recover it. - Go to “Free Shared Hosting”.
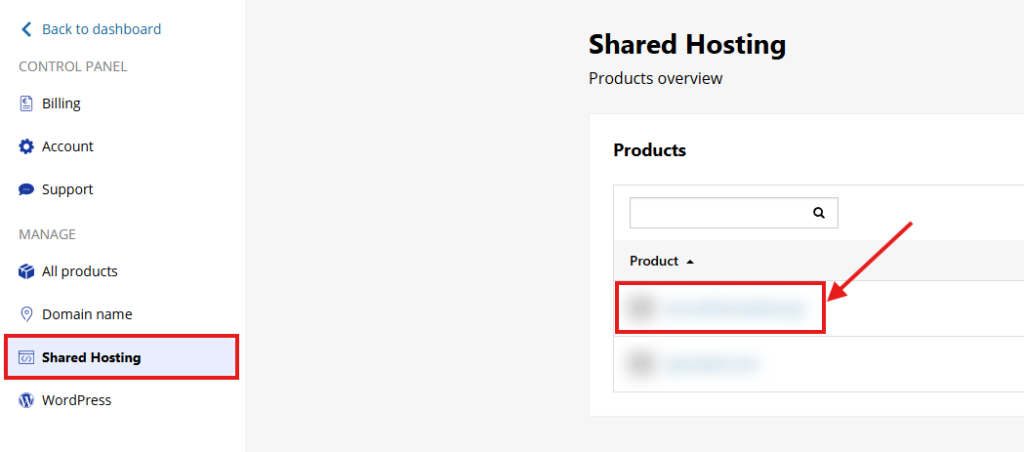
- Select your free hosting plan.
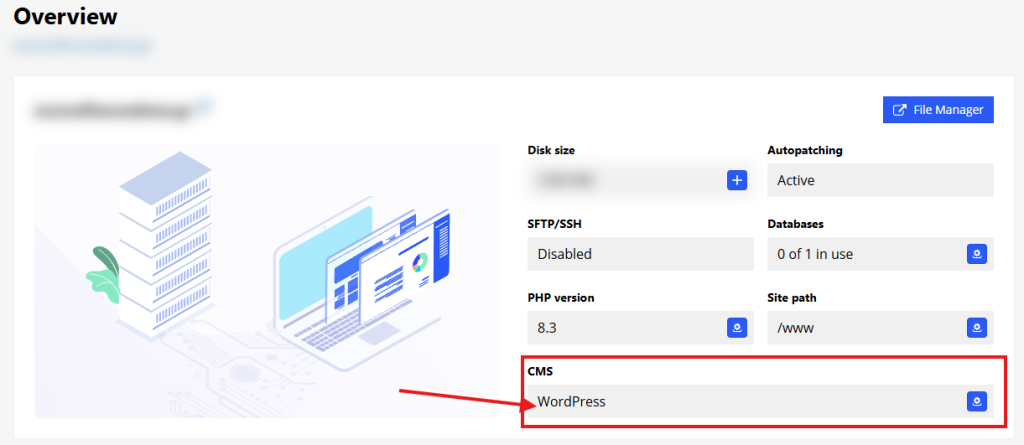
Important:
- If there is a pre-installed WordPress that you do not want to use:
- Contact technical support to perform a hosting reset
Alternatively:
If no WordPress installation exists, continue to the next step.
3. Activate Hosting
- After the reset (if needed), go to “Pending Activation”
- Click “Free Shared Hosting”
- Enter your domain name
- Click “INSTALL HOSTING”
- Select your hosting plan again
4. File Transfer (Restore from Backup)
- Open the File Manager
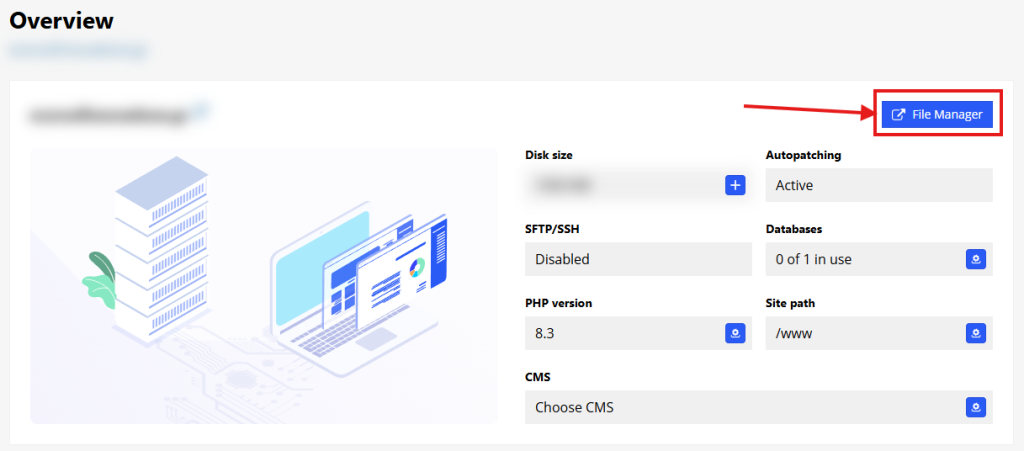
- Navigate to the folder:
www(this is your website’s document root)

- Delete the default file:
index.html
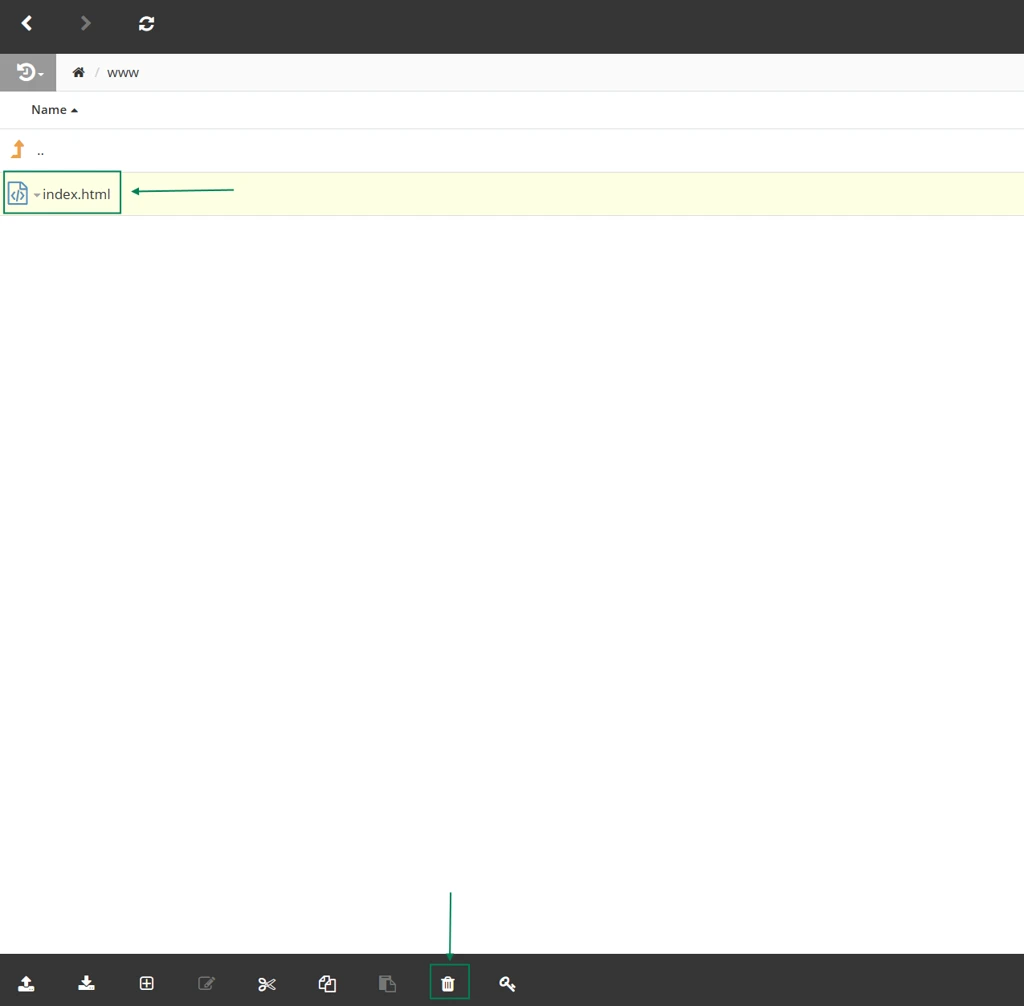
Note: If this file is not removed, it may override your website content.
5. Upload & Extract the Backup
- Click Upload Zip. Upload your
.zipbackup file
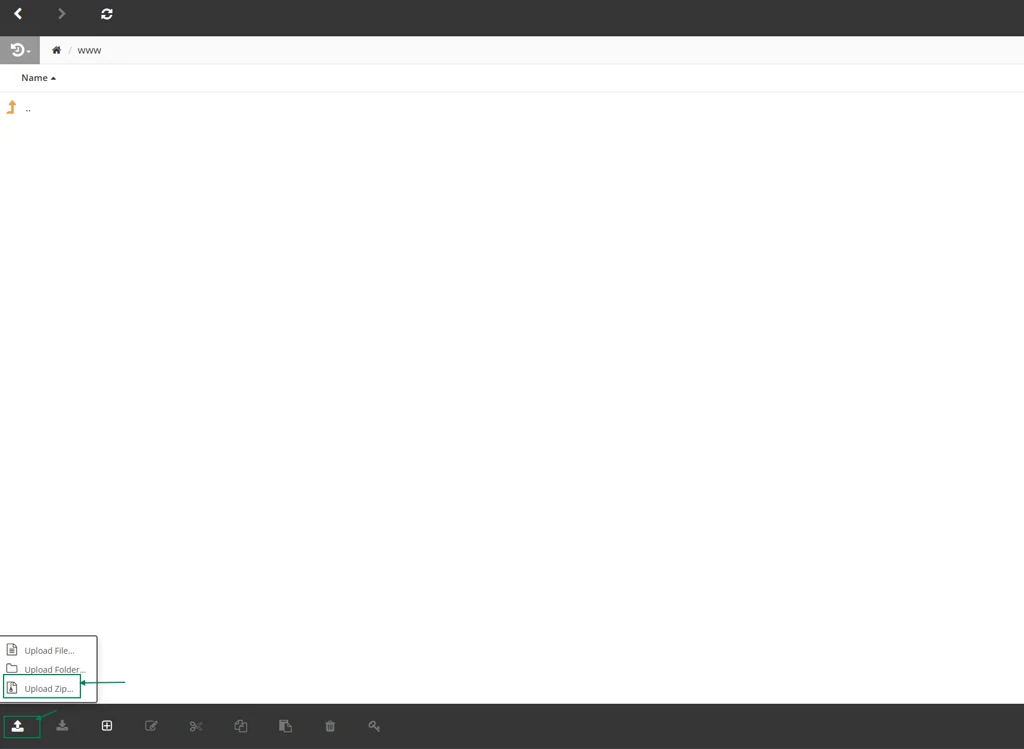
- Once uploaded:
- A pop-up will appear
- Select “Upload and Unzip”
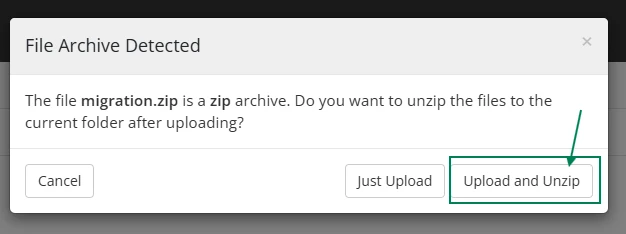
The contents will be automatically extracted into the www folder.
Completion
Your website has now been successfully migrated to Papaki 2.0.
You haven't found what you are looking for?
Contact our experts, they will be happy to help!
Contact us