
Customer Support
SSL Activation Guide
What is SSL?
SSL (Secure Sockets Layer) is a technology that protects the information we send and receive over the internet. It is primarily used on websites to ensure that data—such as passwords or credit card details—cannot be read or tampered with by unauthorized parties.
Key Features:
- Encryption: Makes the data unreadable to anyone who tries to intercept it.
- Secure Connection: Helps ensure that you're connecting to the legitimate website.
- Data Integrity: Prevents information from being altered during transmission.
SSL Activation Process
If you already have an SSL certificate, its setup includes two main steps:
- Certificate Activation
- Certificate Installation on your hosting package at Papaki
This article focuses on the first step: activating your SSL certificate.
To proceed with installation, follow the detailed instructions available in the related article from our knowledge base:
Important Notice for Legacy Papaki Control Panel
If you have an SSL certificate issued via the old Papaki Control Panel that has not been activated (status: New, Pending Approval, or Canceled), you’ll need to contact our Support Team for instructions on how to proceed.
Activation for these certificates cannot be completed through the old interface and may require additional steps.
What you need to do:
Please reach out to our support team via live chat here or submit a support request through your account to receive the necessary guidance.
IMPORTANT: This guide refers exclusively to SectigoSSL DV (Domain Validation) certificates. If you have purchased a different type of SSL certificate, please refer to the corresponding guide for instructions.
1. Start the SSL Activation
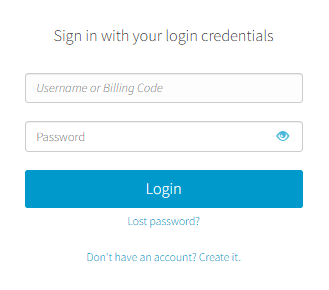
- In the “To Be Activated” section, find the SSL certificate you want to activate and click on it.
- Click Activate.

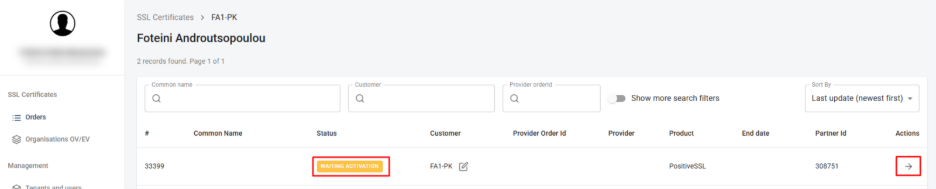
2. Access the SSL Management Interface
You will be redirected to the SSL management panel.
- Locate the certificate and click the arrow icon (→) in the Actions column.
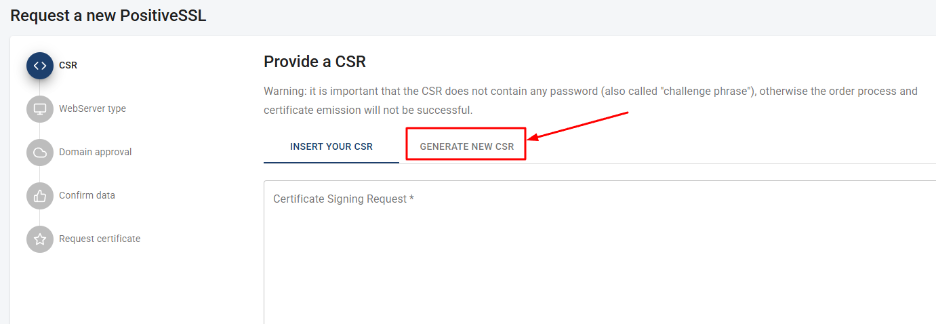
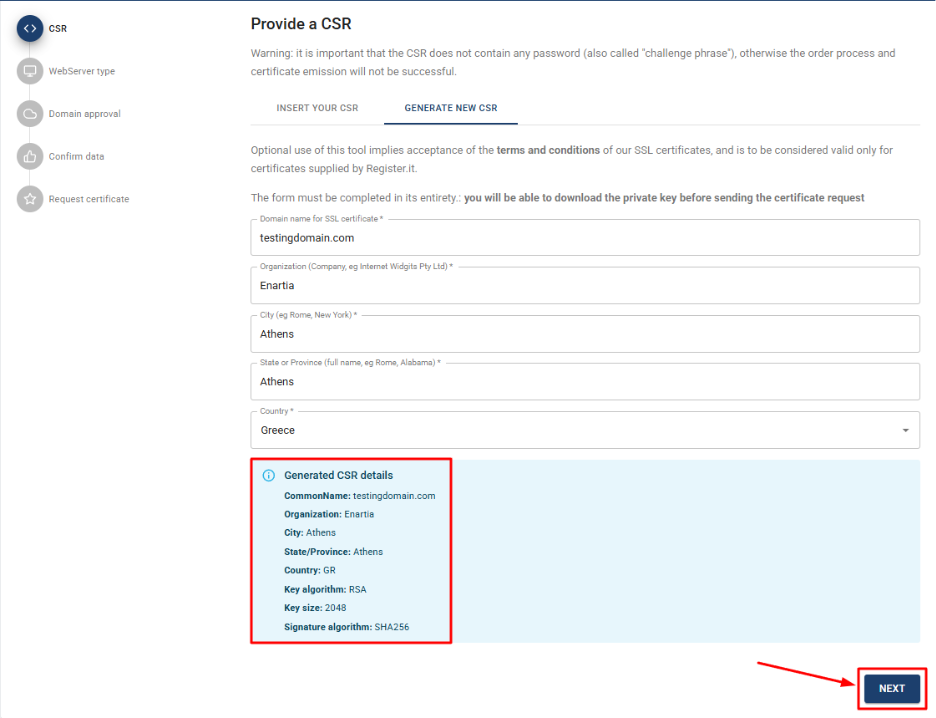
3. Generate a CSR File
- Select the “Generate New CSR” tab.
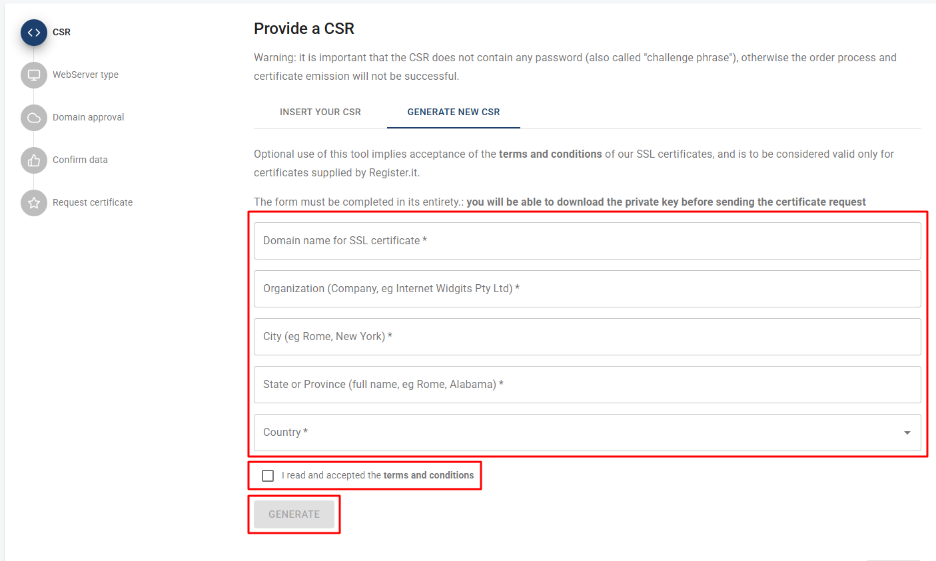
Fill in the following fields:
| Field | Description |
|---|---|
| Domain name | Your domain without "www" or "https" (e.g. example.com) |
| Organization Name | The name of your company or individual |
| City / State / Country | The geographic details of the owner |
- Accept the terms and conditions by checking the box.
- Click Generate, then Next.
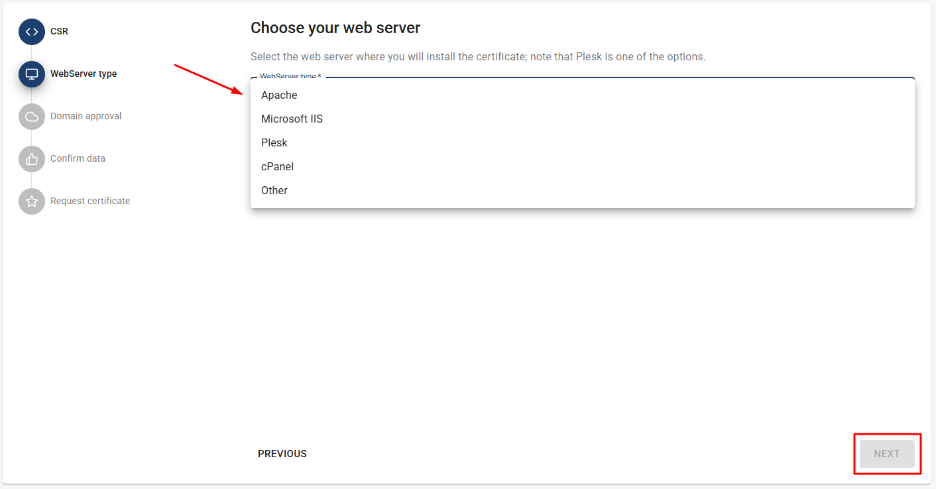
4. Choose Server Type
- From the list, select the server type (e.g., Apache).
- Click Next.
5. Select Domain Validation Method
There are two available methods:
A. Email Validation
- Under Domain Approval Method, select Email.
- Choose one of the listed domain-based email accounts.
- Click Next and check your email for the confirmation message.
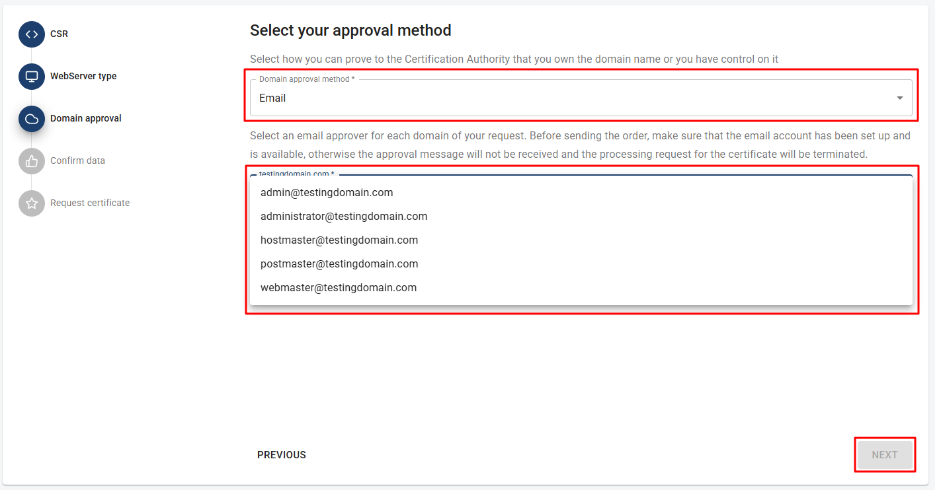
Note: You cannot use a custom email. If the listed address doesn't exist, create it or choose another method.
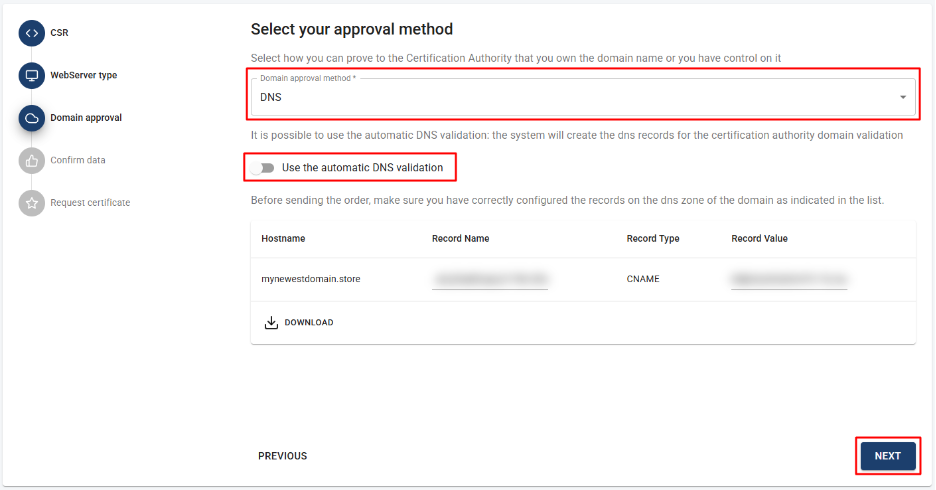
B. DNS Validation
- Choose DNS as the method.
- If you are using Papaki DNS, enable "Use automatic DNS validation" and click Next.
- If not, copy the provided CNAME record and add it to your DNS zone manually.
6. Download the Private Key
- After choosing a validation method and accepting the privacy terms, download your Private Key.
- Then click Next.
IMPORTANT: The Private Key is essential for installing your certificate. Store it securely. If lost, you must reissue the certificate.
You can open the file with Notepad. It will begin with:
-----BEGIN PRIVATE KEY-----
7. Wait for Validation
The status will show as WAITING VALIDATION.
- If you selected email validation, the process begins once you confirm the email.
- If you selected DNS (automatic or manual), issuance typically completes within a few minutes after DNS updates.
8. Download the SSL Certificate
When issued, the status will change to ISSUED. You will be able to download:
- The .CRT file (for Papaki hosting)
- The .p7b file
- Intermediate certificates (CA Root / CA Intermediate)
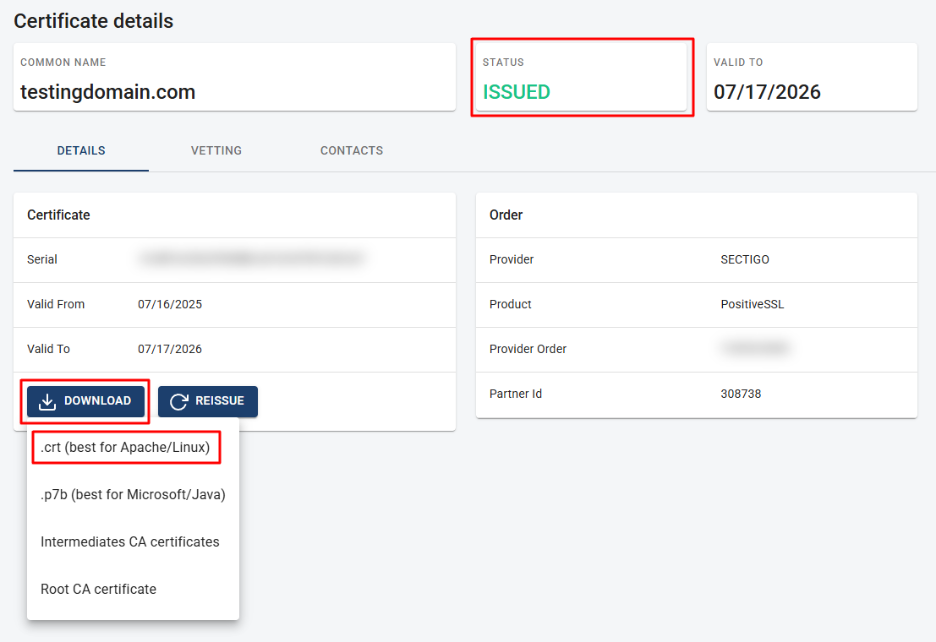
IMPORTANT: The .CRT file and the Private Key are both required for installation.
The certificate file will begin with:
-----BEGIN CERTIFICATE-----
9. Next Steps
You can now proceed with the installation on your hosting.
If you're using Papaki hosting, follow the installation guide here.
Frequently Asked Questions (FAQs)
Can I use a different email for activation?
No. It must be one of the listed domain-based emails. If it doesn't exist, create it or use DNS validation instead.
Can I cancel the activation process?
Yes, as long as the status is still “Pending”. Click the trash icon to cancel it.
Can I change the CSR details I submitted?
Yes, if the SSL hasn’t been activated yet. Otherwise, you’ll need to reissue the certificate.
Can I activate SSL for a domain not hosted at Papaki?
Yes, as long as you can update its DNS records or use one of the listed domain-based emails.
How long does it take for the SSL to be issued?
Usually, within a few minutes after validation. In some cases, it might take up to 24 hours.
What if I lose the Private Key?
You’ll need to reissue the certificate, as the Private Key cannot be recovered.
Can I change the domain after SSL is issued?
No. SSL certificates are domain-specific. You’ll need to purchase and activate a new one or reissue the existing one.
You haven't found what you are looking for?
Contact our experts, they will be happy to help!
Contact us