
Customer Support
How can I create an email account?
To start using the email service that comes with your hosting package, you'll need to create an email account using the domain name you've assigned to that package.
Attention!
If your hosting package includes the Plesk Control Panel, please refer to the guide available here.
What you need to know before getting started
- To use the new email hosting packages from the new Papaki Control Panel, your domain must be within the same Papaki account. More specifically:
- Papaki must be the domain registrar, and
- the domain must be managed from the same account where you want to activate the email package.
- If your hosting package is already activated and linked to a domain, you can proceed to create email accounts immediately.
- The process is completed entirely within the Mail Manager interface. It’s simple and doesn’t require technical knowledge.
- If you haven’t activated any email package yet, you can find detailed instructions here.
Steps to create an email account
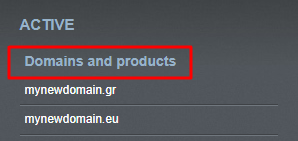
- From the right-side menu, select the domain whose email settings you want to manage.
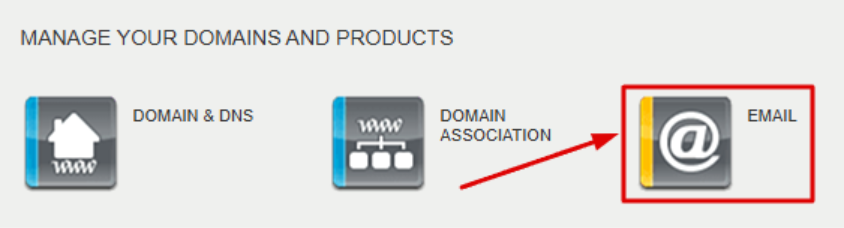
- Click on Email, which will redirect you to the Mail Manager interface for that domain.
- Click Add and complete the form in the popup window.

In the Mailbox tab, fill in the following:
- The email address you want to create (the domain part @mydomain.com is pre-filled and cannot be changed).
- The desired password. It must meet the following criteria:
- You can use letters, numbers, and these special characters:
- ! @ # $ % ^ & * + . , _ -
- Confirm the password.
- Select the hosting package (from those linked to the domain) that you want to assign resources to.
You can also see how many additional email accounts you can still create.
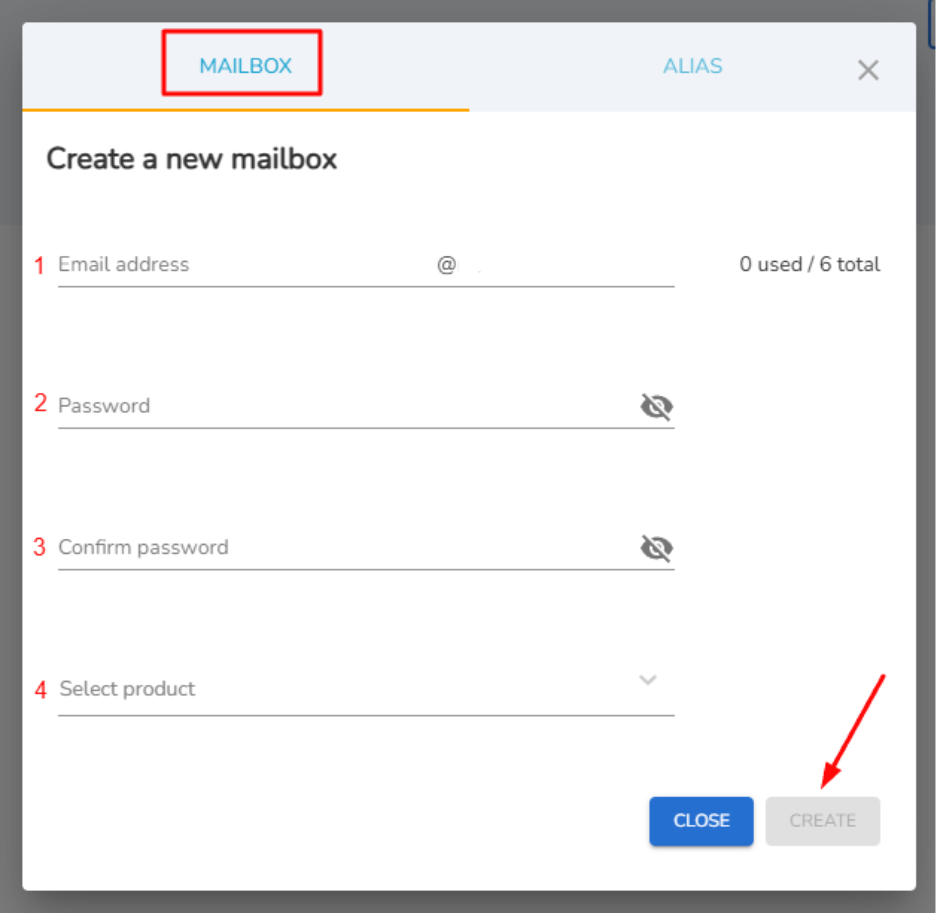
- Click Create, and your new email account will be ready for use.
You can access it via https://webmail.papaki.com/
Additional Information
- Email accounts are managed per domain, not centrally across all domains in your account.
- You can associate multiple hosting email packages with the same domain.
- If you need more email accounts than your current plan allows:
- You can activate another email hosting package from your Papaki account.
- Or you can purchase additional mailboxes through the Purchase more mailboxes option.
- If your domain:
- is registered with another provider,
- is under a different Papaki account, or
- is still in the old Papaki Control Panel
Please contact us so we can explain your available options, as it is not technically possible to use the email hosting packages offered by the new Papaki Control Panel in these cases.
My email is hosted in a hosting pack that includes the Plesk Control Panel
In case you want to create a new email account, you could follow the next steps:
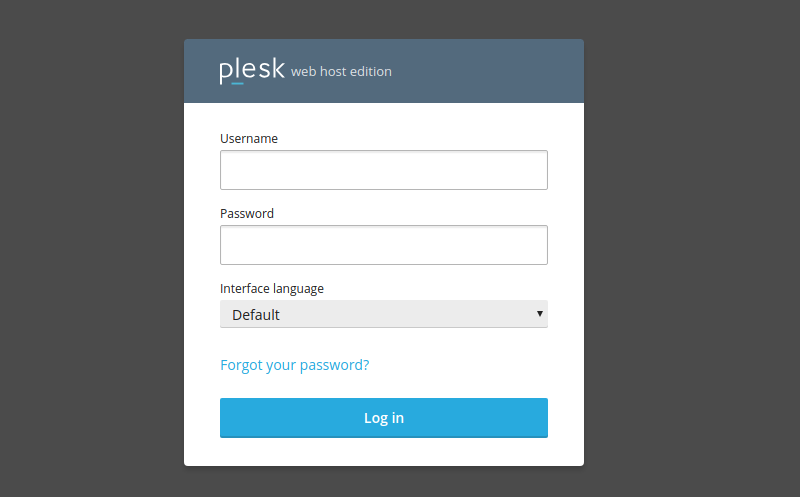
1. Log in to Plesk, with the login details you received in the hosting activation email.
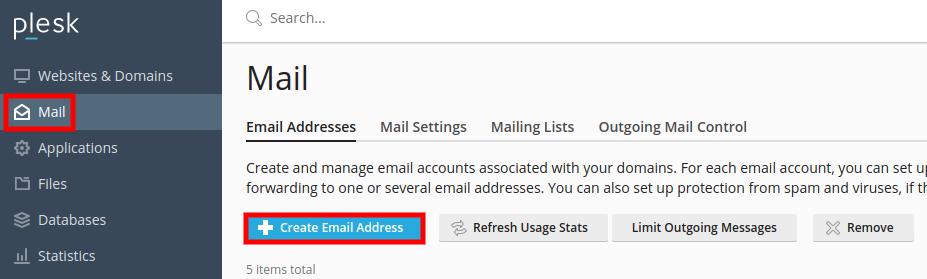
2. In the tab Mail, click Create Email Address.
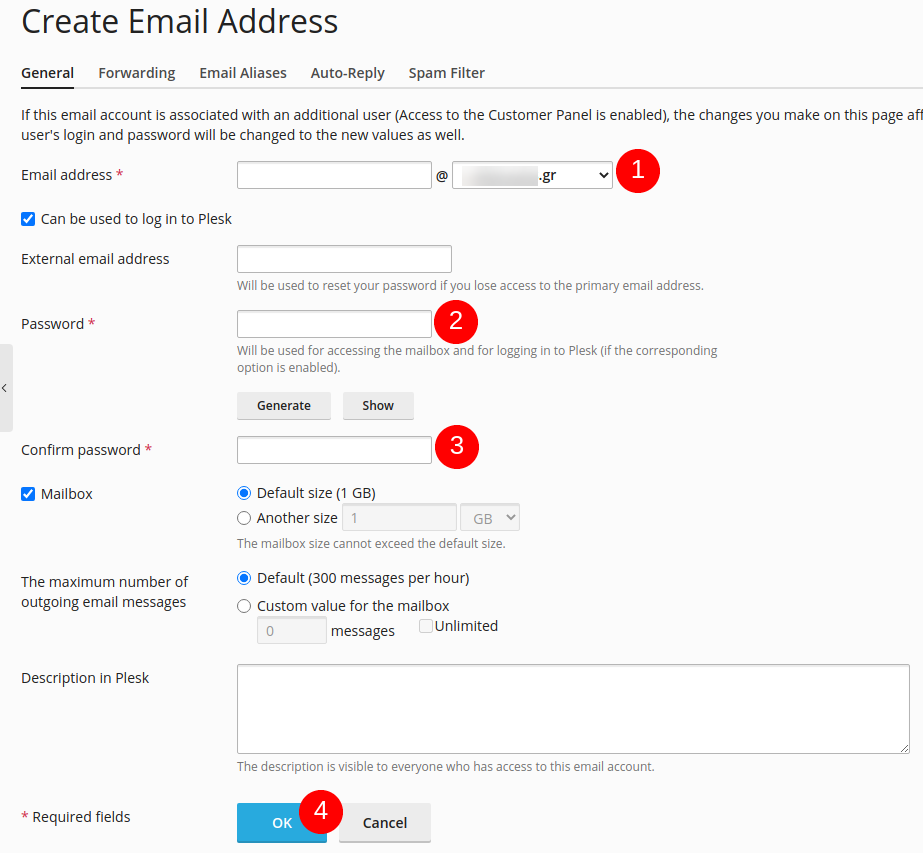
3. To create the account, you have to state the following information:
- In the Email address field, select the prefix you want the new email to have, e.g. info@domain.com. If you have more than one active websites, choose the website for which you want to create your email account, from the drop down menu.
- In the Password field, specify the password with which the user of the email you create will be able to log into the email service. Confirm the password by typing it one more time.
- Then, click OK and your email account is good to go.
You haven't found what you are looking for?
Contact our experts, they will be happy to help!
Contact us