Customer Support
How do I activate the Let’s encrypt SSL?
How the free Let’s Encrypt SSL works with your hosting plan
All of our hosting plans come with a free Let’s Encrypt SSL certificate, which is automatically enabled for every domain hosted on your web hosting account. Below you’ll find key information about how it works and how to manage it through your Papaki control panel.
What is Let’s Encrypt SSL?
SSL (Secure Sockets Layer) is a security protocol that encrypts data transmitted between a visitor’s browser and your website’s server. Let’s Encrypt is a trusted Certificate Authority that issues free SSL certificates, and it’s automatically included in our hosting services.
Automatic Activation & Renewals
- The Let’s Encrypt SSL certificate is automatically activated for every domain hosted in your account.
- The certificate is automatically renewed every 90 days.
- No action is required on your part to activate or renew it.
Managing HTTP to HTTPS Redirection
To ensure your visitors are always accessing the secure version of your site, you can enable or disable redirection from http to https via your Papaki control panel.
Attention!
If you have an email hosting package hosted on a Plesk infrastructure, please refer to the guide available here.
[Papaki 2.0]
Steps to Manage Redirection:
- From the dashboard, locate the product you want to manage. Click the name of the plan.
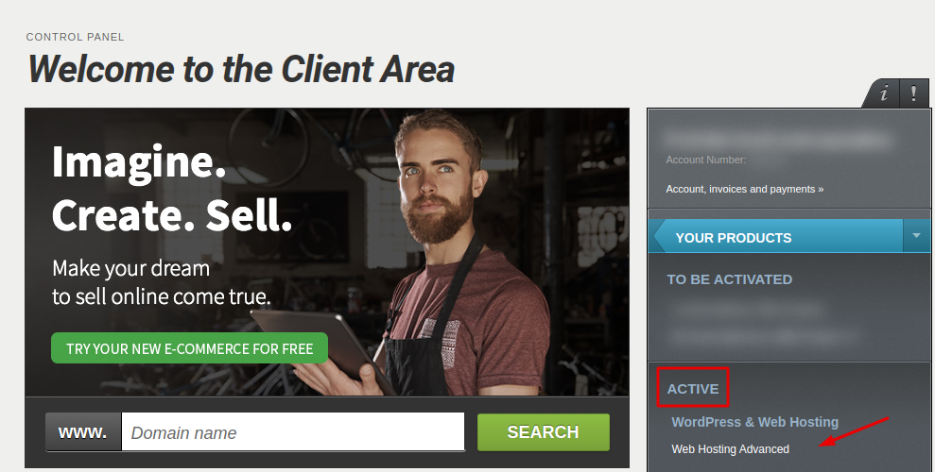
You will be redirected to the hosting management area. Here you can view, by category, all services linked to your Papaki account.
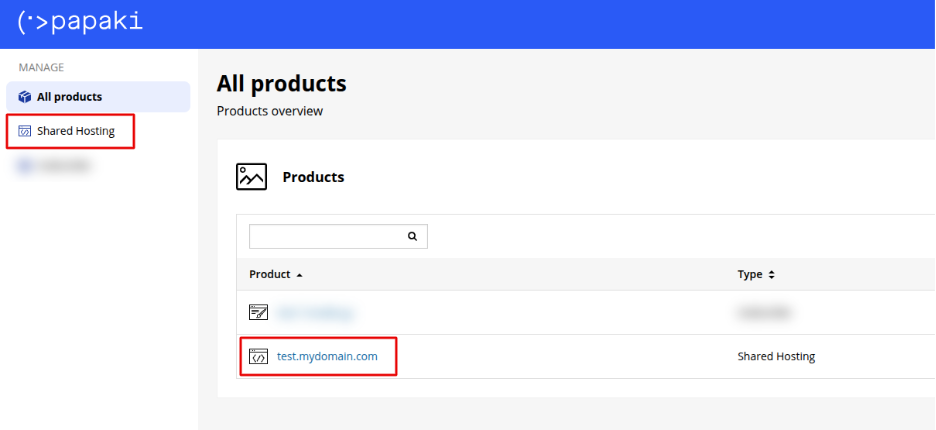
- Click the hosting plan name you want to manage.
- In your dashboard, in Sites tab, click Domains & SSL and find the domain you want to configure. Click “Manage” to access its settings.
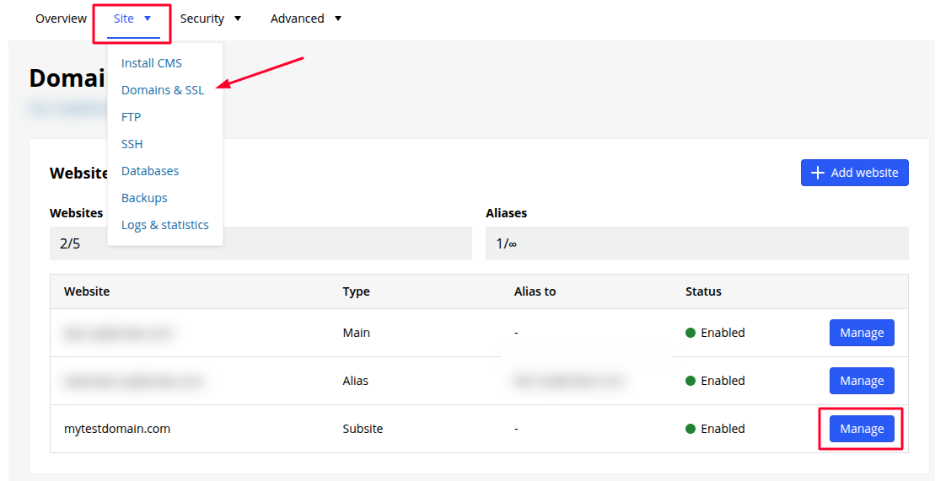
- Toggle the redirection setting to enable or disable http to https redirection based on your preference. You can also reissue the certificate.
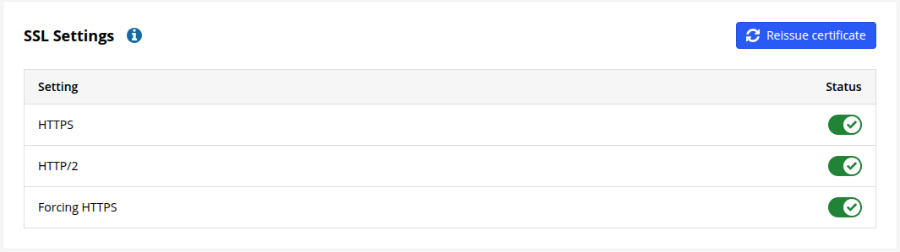
By default, every new website (including the alias domain) is provisioned with a Let’s Encrypt SSL certificate.
To improve your website’s loading speed, we recommend enabling HTTP/2. Unlike the older HTTP/1.1 protocol, HTTP/2 supports multiple simultaneous requests over a single connection, significantly reducing response time.
Visitors who do not explicitly enter the https://mydomain.com address are automatically redirected to the secure (HTTPS) version of your site. Please note that changes may take up to 15 minutes to take effect.
Frequently Asked Questions
What happens if the SSL certificate expires?
No worries! The certificate is renewed automatically every 90 days, as long as your domain is active on our hosting.
Can I use my own SSL certificate instead?
Yes, you can choose to install a custom SSL certificate (e.g., Wildcard or Extended Validation) through your hosting control panel.
[Papaki 1.0]
Let's Encrypt SSL Certificate is a certificate authority (CA) that allows you to create a free SSL certificate for your domain. You can easily activate it from within Plesk by following these steps.
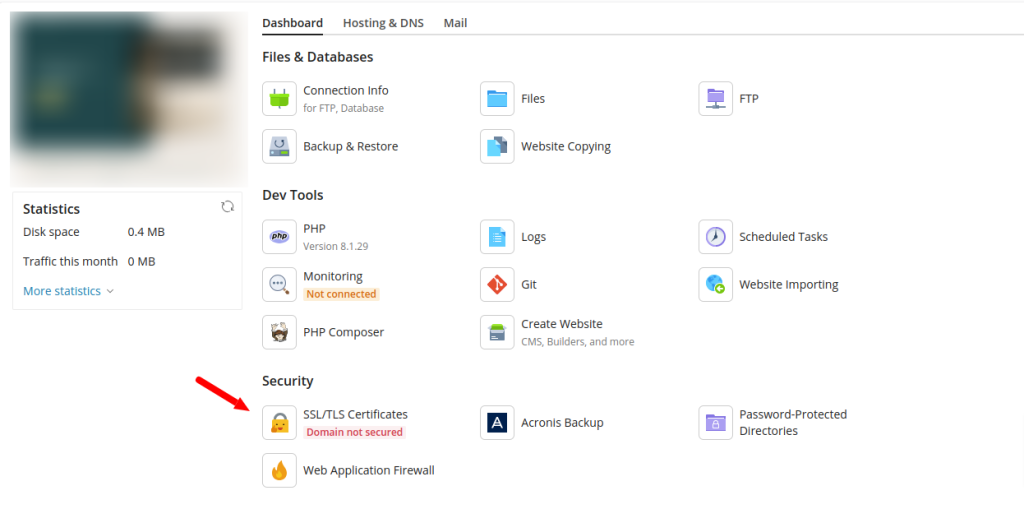
On the Websites & Domains tab, select the SSL/TLS Certificates icon.
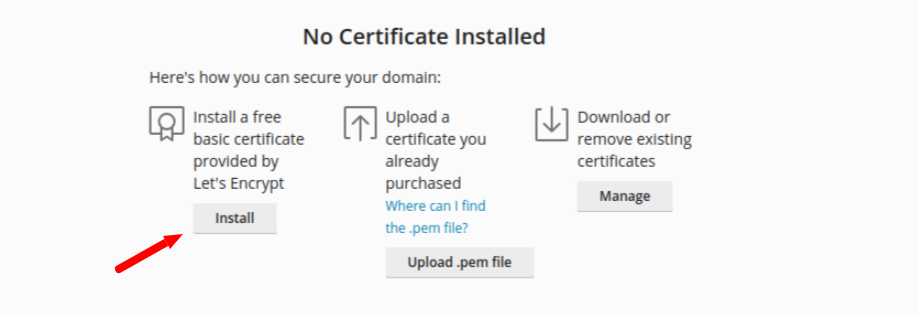
In the next tab select Install to start the activation process.
Then,
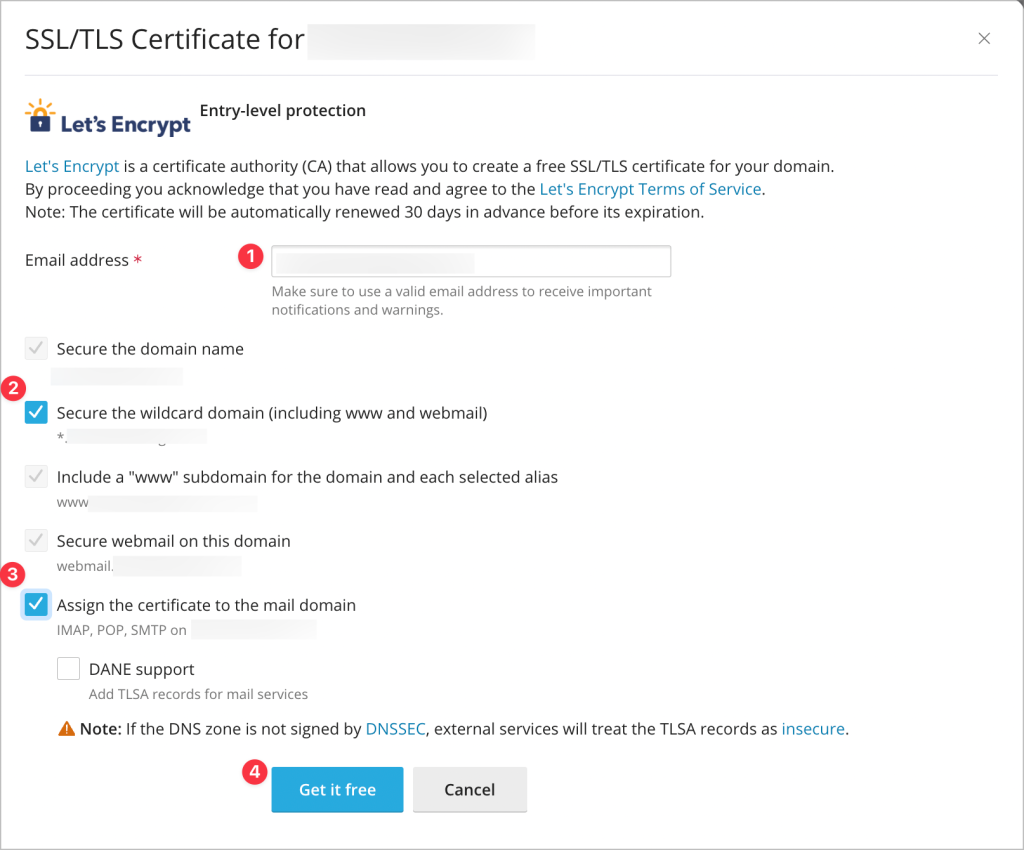
- Provide a contact email (there is a possibility to use it in case of urgent announcements or a loss of key, so that it can be resent)
- Check the Secure the domain name option
- In case you wish to secure www.yourdomain.com as well, check the Include a "www" subdomain for the domain and each selected alias
If you wish to secure your webmail with Let's Encrypt, check the Secure webmail on this domain option.
Alternatively, you can check the Secure the wildcard domain (including www and webamail) option, which secures www.yourdomain.com , the webmail, and all other subdomains of the host domain, if any.
Select Get it Free
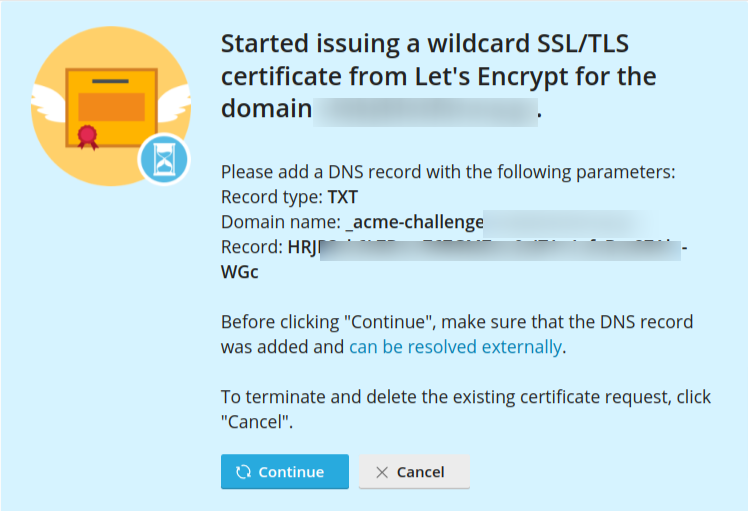
In the next step you will see a blue box with a DNS / TXT record, if you use directly the nameservers of your hosting package by clicking Continue the record will be added automatically and the security certificate will be installed automatically, if you use an external DNS service then you will need to manually add the record that will be given to you and then select Continue to complete the process.
Notes: The duration of the Let's Encrypt SSL Certificate is three months and is automatically renewed 30 days before its expiration, in case you use an external DNS service, you will need to renew it manually and re-pass the new TXT record. It is possible that shortly before the certificate expires, you will receive notification emails to the email account you registered when activating the certificate. If for any reason it is not renewed, select Reissue Certificate
You haven't found what you are looking for?
Contact our experts, they will be happy to help!
Contact us