
Customer Support
(Managed Hosting for WordPress) – How do I manage my hosting plan for WordPress?
Once you've activated your Managed Hosting for WordPress plan, you can manage all its features and settings through your Papaki hosting control panel.
Haven’t activated your plan yet? Follow this guide to activate your hosting for WordPress.
Step-by-step: Manage your plan
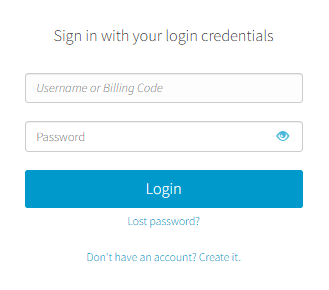
- From the dashboard, locate the product you want to manage. Click the name of the plan.
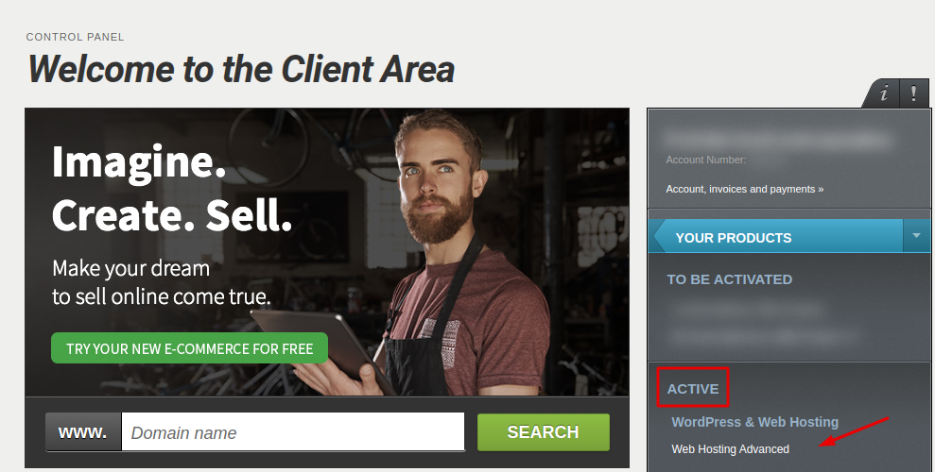
You will be redirected to the hosting management area. Here you can view, by category, all services linked to your Papaki account.
- From the left-hand menu, go to Hosting Packages and click on WordPress. Then, choose the hosting pack.
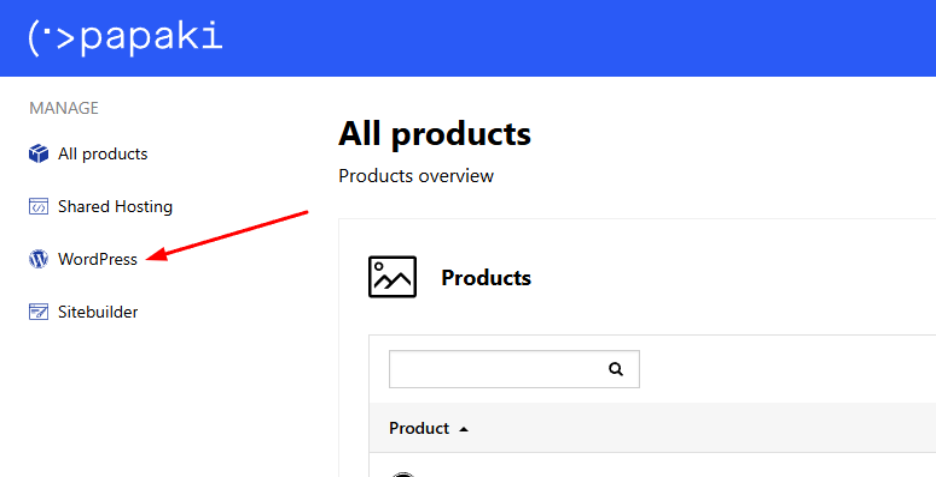
- Locate your active plan and click on it to access its management overview.
What you can manage
From the Overview tab, you can view:
- Your plan’s IPv4 and IPv6 addresses
- The WordPress version currently installed
- The disk usage of your website and files
- The database size
- The date and time of the latest available backup
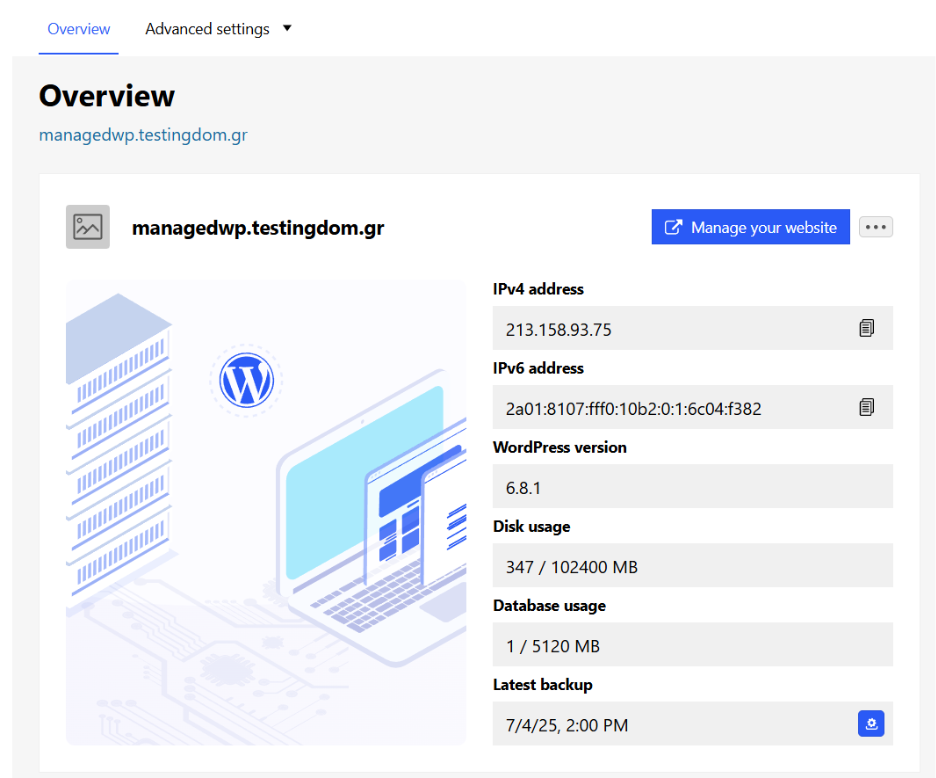
You can also access your WordPress admin dashboard directly without entering credentials by clicking Manage your website.
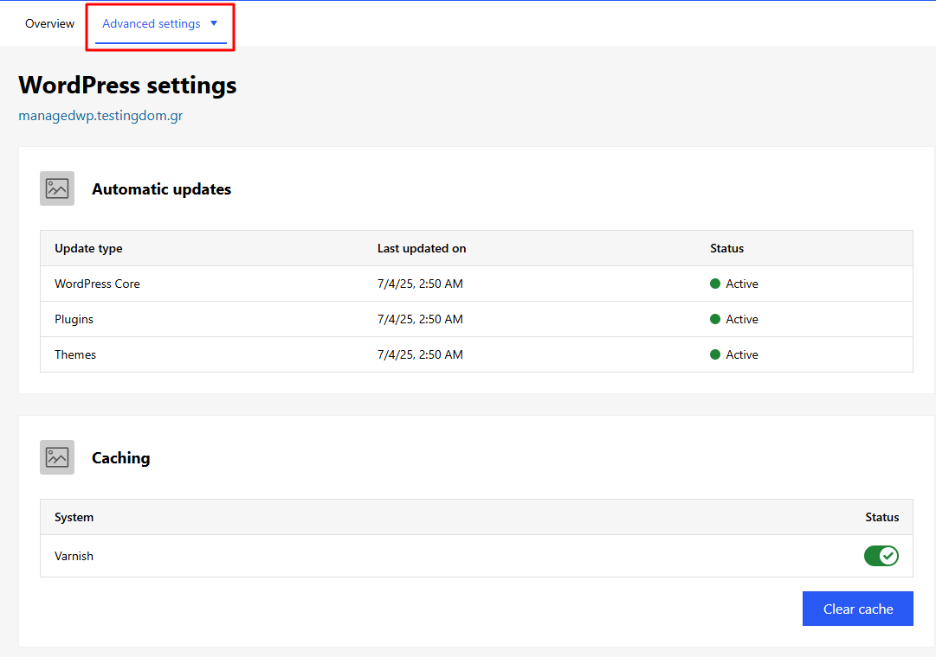
From the Advanced settings tab, you can manage:
WordPress
- View installation details and site statistics
- Monitor plugin & theme auto-updates
- Clear or monitor cache memory
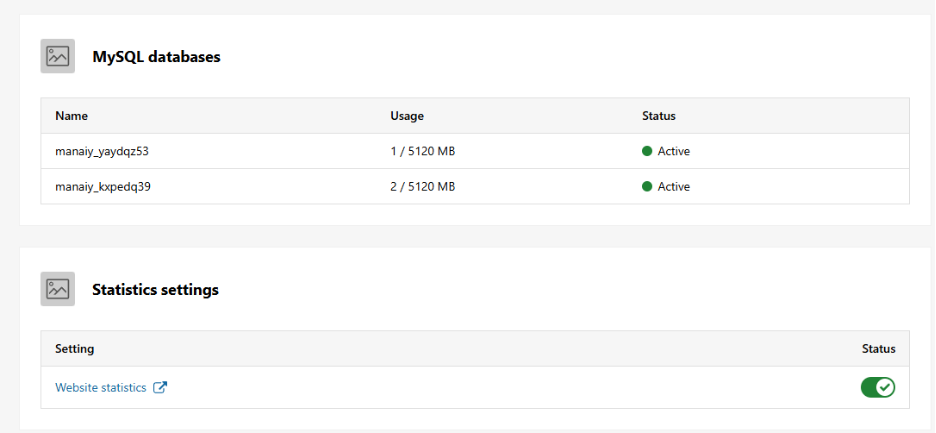
- View database name and size
- Access AwStats for website traffic analysis
Note: For security reasons, database access is not provided on Managed Hosting for WordPress plans.
Domains
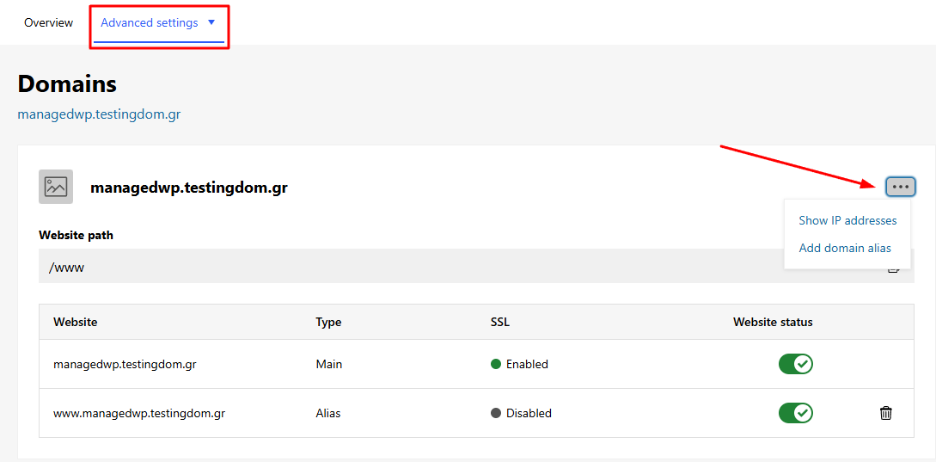
- View active/inactive domains (main & aliases)
- Add/remove domain aliases
- View your hosting IP address
- Disable the website entirely if needed
Test environments
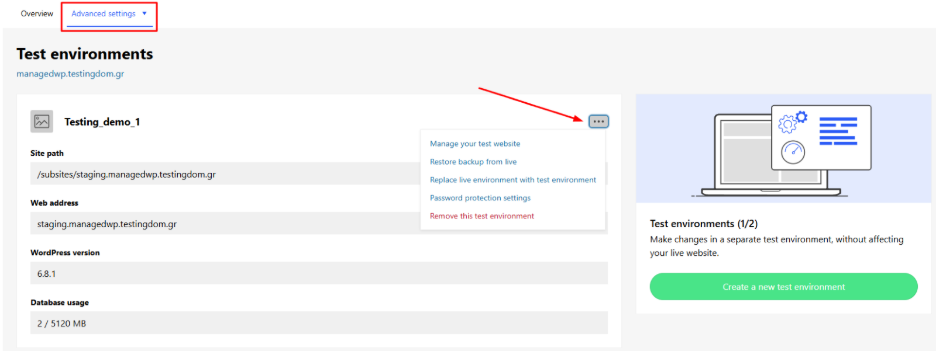
- Create or manage test installations
- Restore a test site from backup
- Promote a test site to live (production)
- Delete unused test environments
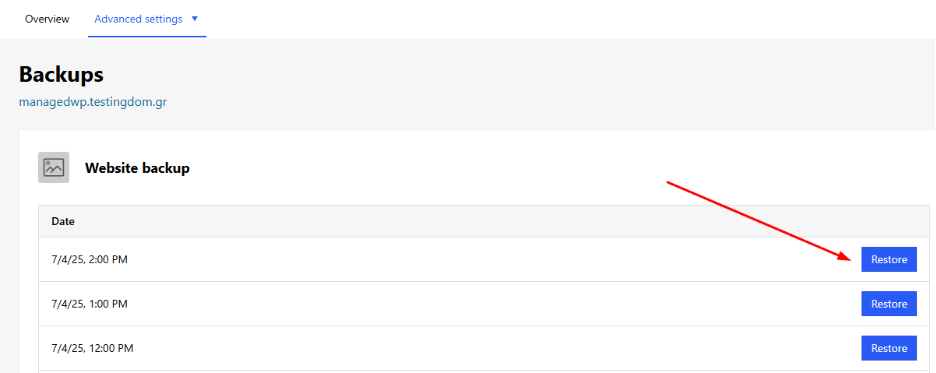
Backups
- Restore your site to a previous state
- Choose from available backups based on your plan
- Confirm before proceeding, as this action replaces all current data
Security
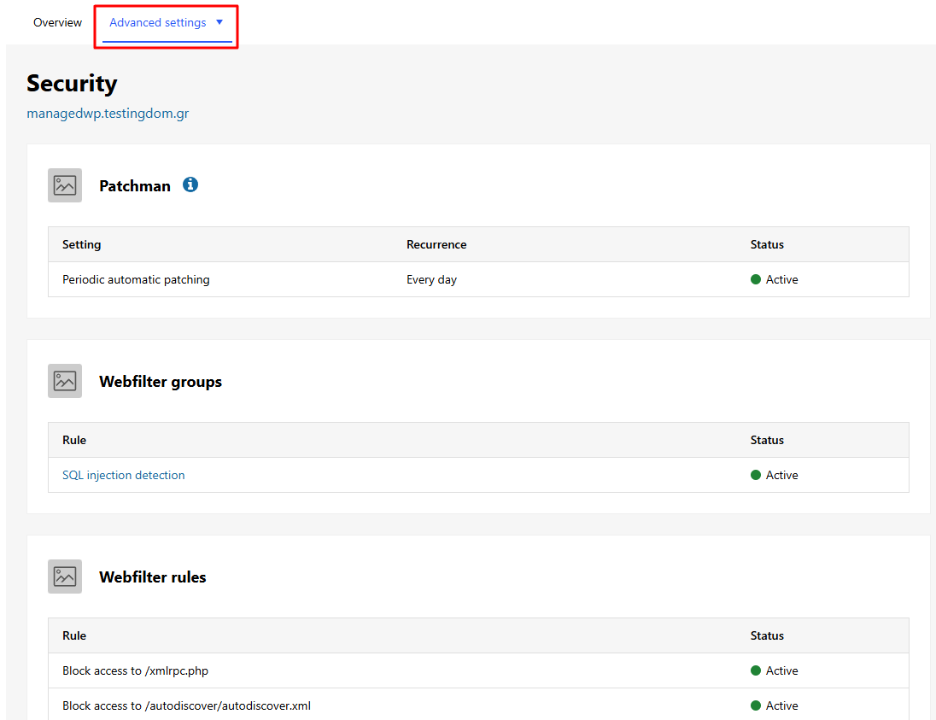
- Automated malware scans and threat detection
- No action needed on your part
- Automatic repair if malicious content is found
SSL
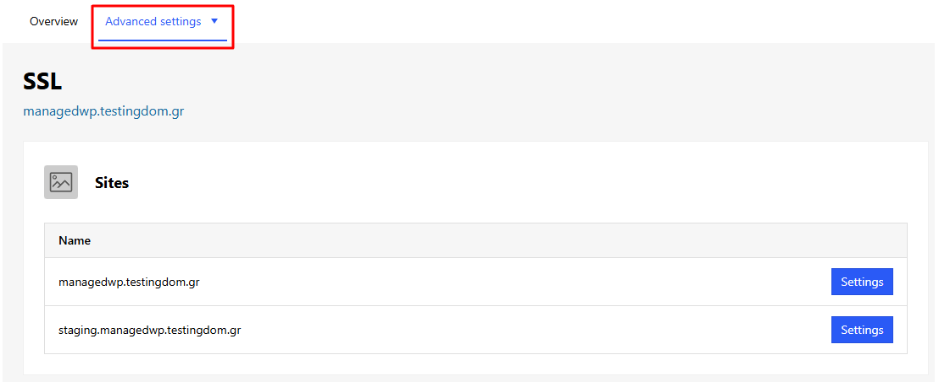
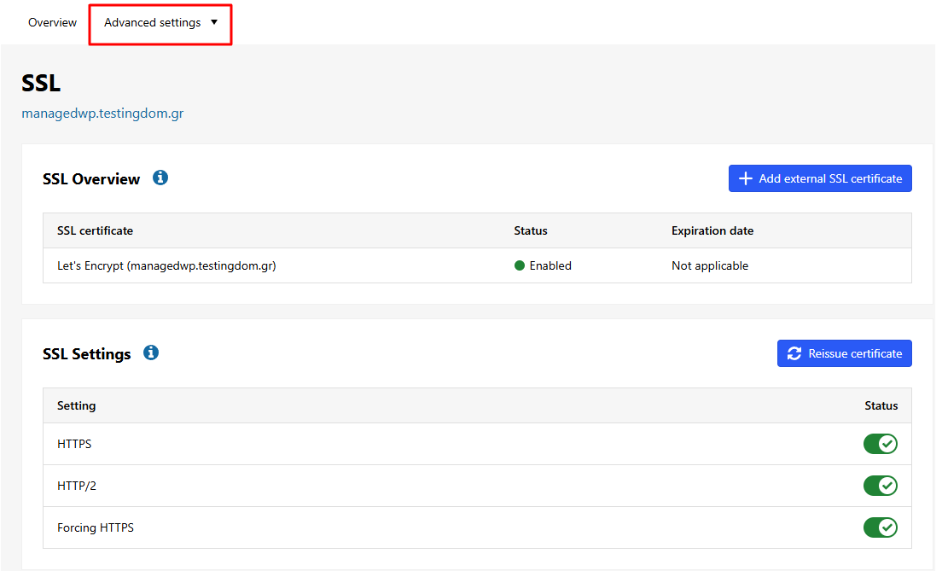
- Check for active SSL certificates
- Reissue your free Let’s Encrypt certificate
- Install your own external certificate if you have one
Frequently Asked Questions (FAQs)
Can I change my WordPress username or password after installation?
Yes. Log in to your WordPress dashboard and go to Users > Profile to make changes.
Why don’t I have access to the database?
Managed Hosting for WordPress restricts database access for security reasons. Contact support if you need assistance with changes.
How many test environments can I create?
This depends on your hosting plan. If you can’t add more test sites, you may have reached the allowed limit.
What does “Replace live environment with test environment” mean?
It transfers your test site’s content and settings to your live website.
Can I restore only files or only the database from a backup?
No. Restores are full-site actions that replace all content and data.
Does the SSL certificate renew automatically?
Yes, free Let’s Encrypt SSL is auto-renewed. If you’re using a custom SSL, you’ll need to renew it manually.
What happens if my website gets compromised?
Your hosting plan includes regular automated security scans. If a threat is detected, our system will automatically clean or notify you.
You haven't found what you are looking for?
Contact our experts, they will be happy to help!
Contact us