
Customer Support
SSL Installation (Web Hosting, Managed & Unmanaged Hosting for WordPress) – How to install SSL on your Papaki-hosted website?
After successfully activating your SSL certificate, you will need to manually install it on your hosting package. This guide covers the installation process specifically for Papaki hosting services.
This guide applies to the following products:
- Web Hosting
- Managed Hosting for WordPress
- Unmanaged Hosting for WordPress
Reminder
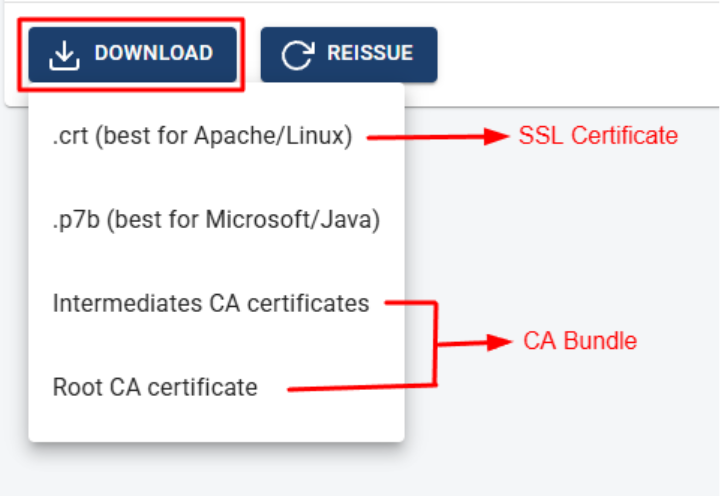
To install your SSL certificate, you’ll need the following files, which you should have downloaded during the issuance process:
- .CRT file (SSL Certificate)
- Private Key
- Intermediate Certificate & Root Certificate (CA Bundle)
Step-by-step Installation Instructions
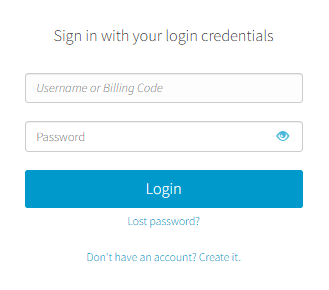
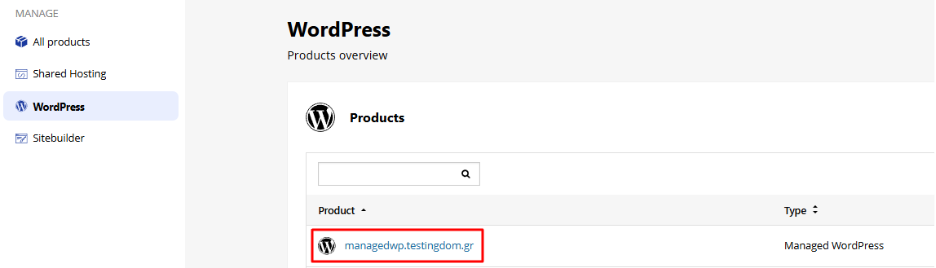
- From the right-hand sidebar, click the name of the hosting service where you want to install the SSL certificate.
Note: If the certificate still appears under "Pending Activation", it means the issuance is not yet complete. Please go back to step 1 of the SSL activation guide.
- In the next window, click on the domain name associated with your hosting.
Installation by Hosting Type
Hosting for WordPress Start, Business, Digital & Premium (Managed & Unmanaged)
- Go to Advanced settings > SSL
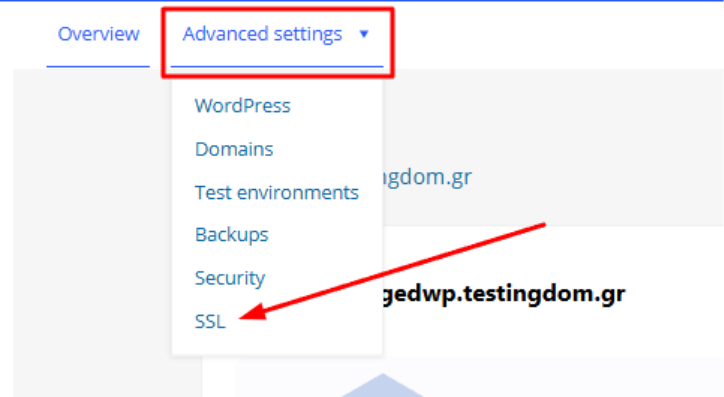
- Click the Settings button

- In the "SSL Overview" section, click + Add external SSL certificate

- In the window that appears, paste the following:
- SSL Certificate: Code from the .CRT file
- Private Key: Code from the Private Key
- CA Bundle: Code from the Intermediate & Root CA certificate
- Click Save to complete the installation.
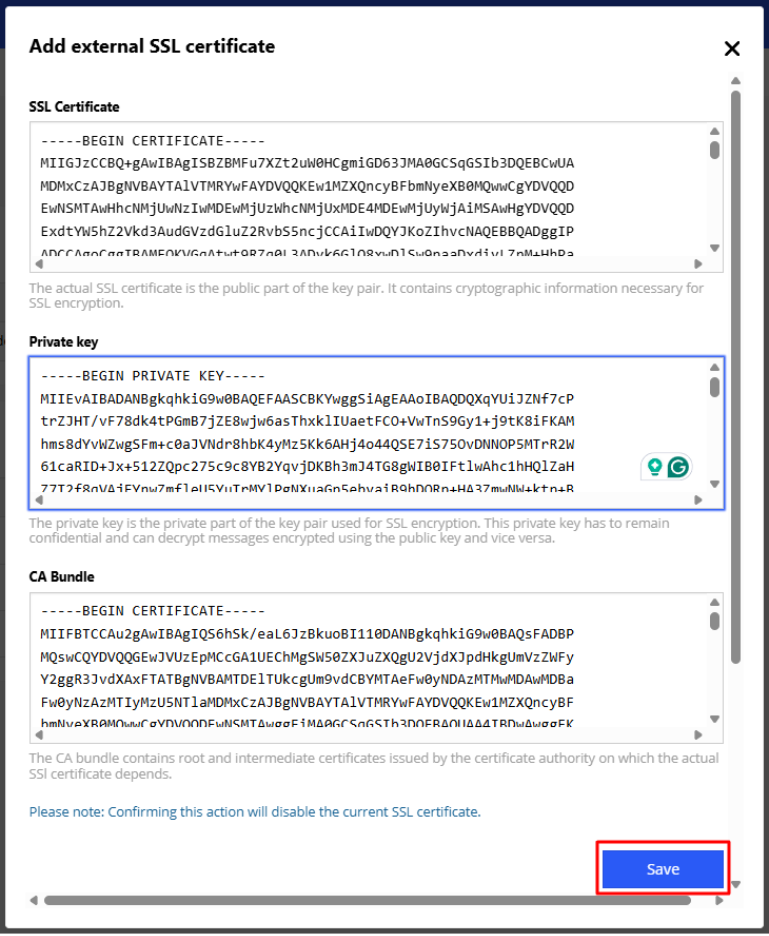
Confirmation: A message will confirm that the installation was successful.

Web Hosting (Starter, Advanced, Expert)
- Scroll to the Websites section and click Manage next to your domain.
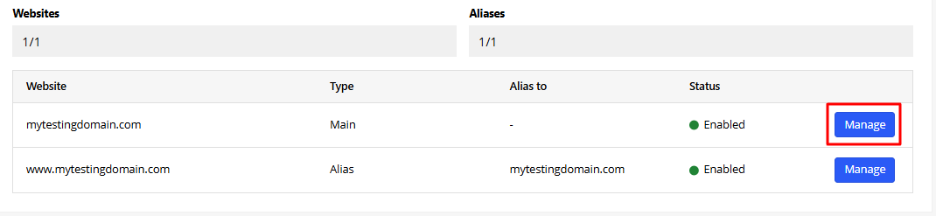
- In the "SSL Overview" section, click + Add External SSL Certificate.

- Paste the corresponding codes:
- SSL Certificate: From the .CRT file
- Private Key: From the key downloaded at issuance
- CA Bundle: From the Intermediate & Root CA
Click Save to complete the installation.
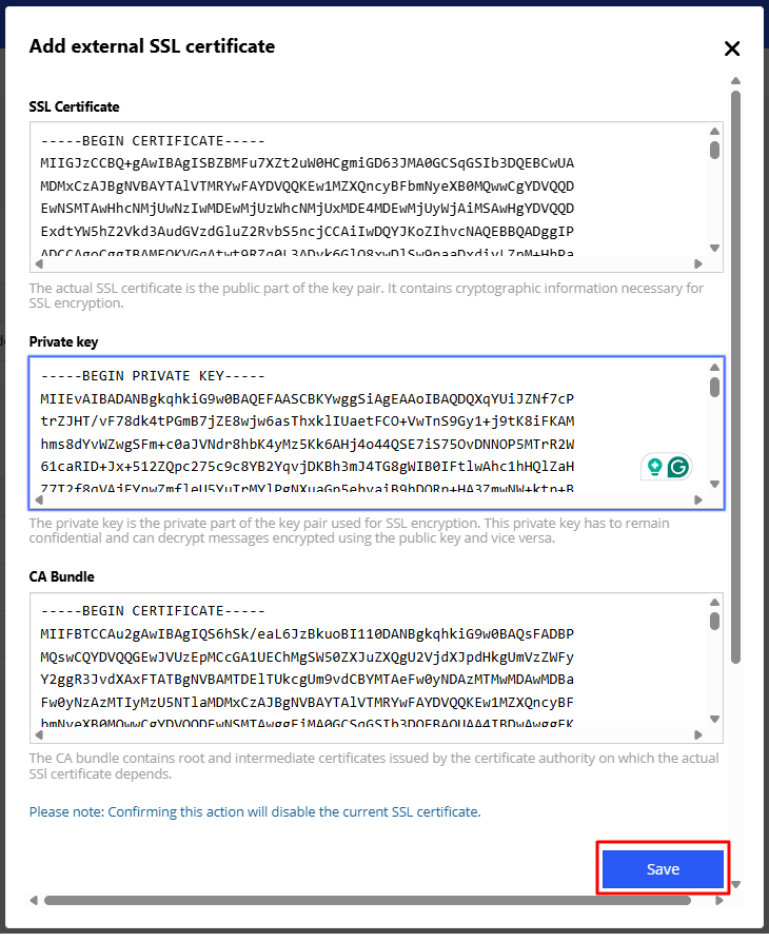
The SSL Certificate is successfully installed.

Frequently Asked Questions (FAQs)
What if I’ve lost my Private Key?
If you no longer have access to your Private Key, the SSL certificate cannot be installed. You will need to reissue the certificate from your Papaki account. Read more here.
Can I use an SSL certificate purchased from another provider?
Yes. You can install an external SSL certificate on your Papaki hosting package, as long as you have:
- The .CRT file
- The Private Key
- The Intermediate & Root CA certificates
How long does it take for SSL to become active?
SSL becomes active immediately after successful installation. However, it may take up to 24 hours to fully propagate and appear secure in all browsers.
How can I check if the SSL is working correctly?
Visit your domain using https:// (e.g., https://mydomain.com). If a padlock icon appears in the browser, the certificate is installed correctly. You can also check using tools like:
https://www.sslshopper.com/ssl-checker.html
Can I install the same SSL on multiple domains or subdomains?
No. An SSL certificate is issued for a specific domain or subdomain. If you need coverage for more domains, consider a Wildcard or Multi-Domain SSL certificate.
What if my website is hosted in a different environment (e.g., old control panel)?
The process will differ. Refer to the dedicated guide or contact Papaki Support to get the correct instructions.
You haven't found what you are looking for?
Contact our experts, they will be happy to help!
Contact us