Customer Support
How can I enable or disable the subscription (auto-renewal) for a service?
You can easily manage the renewal method of your services through your account at Papaki. Below you'll find a step-by-step guide on how to enable or disable auto-renewal, along with how to adjust related settings.
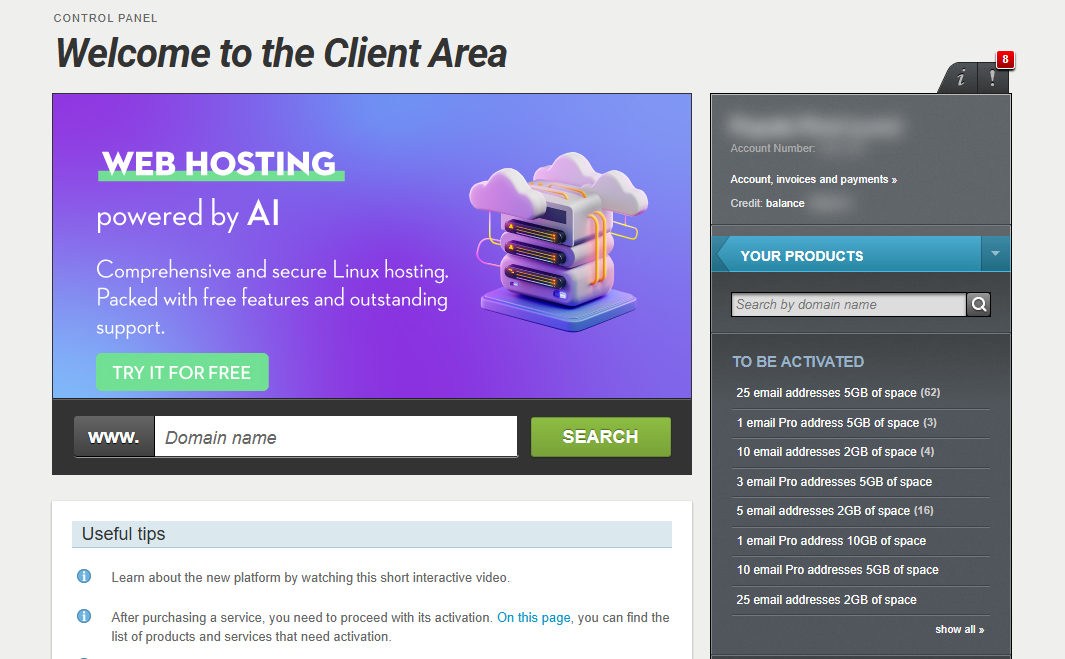
[Papaki 2.0]
Step-by-step:
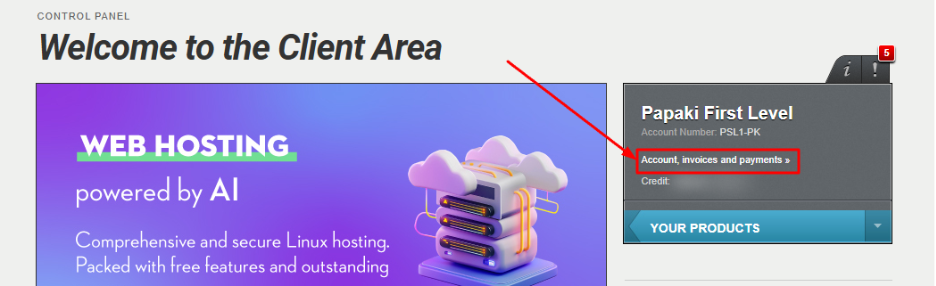
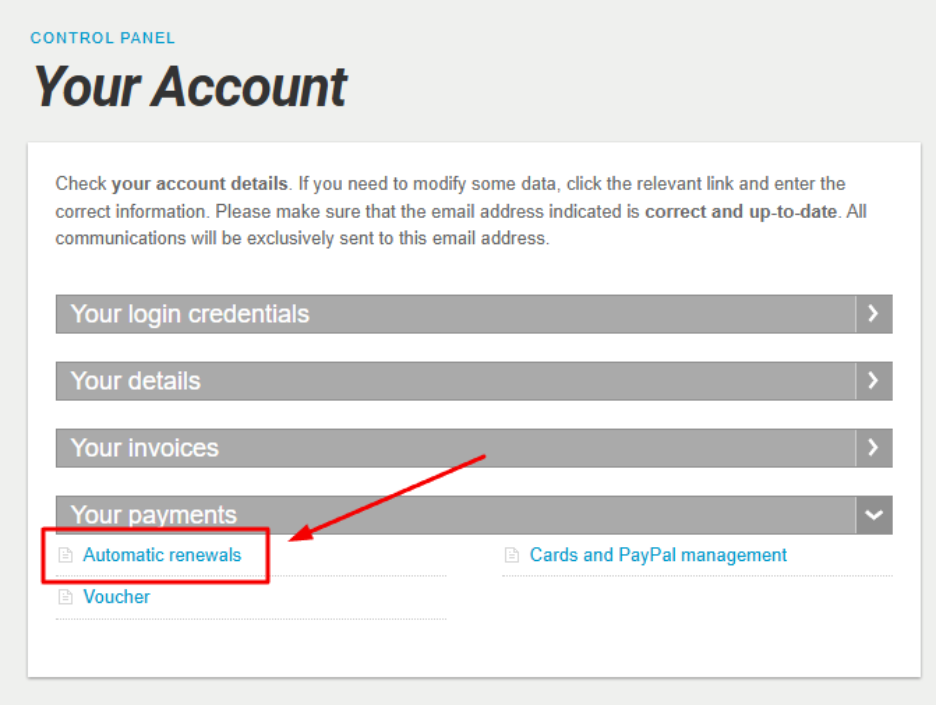
- From the right-hand menu, select Account, Invoices and Payments.
- Under Your Payments, click on Automatic Renewals.
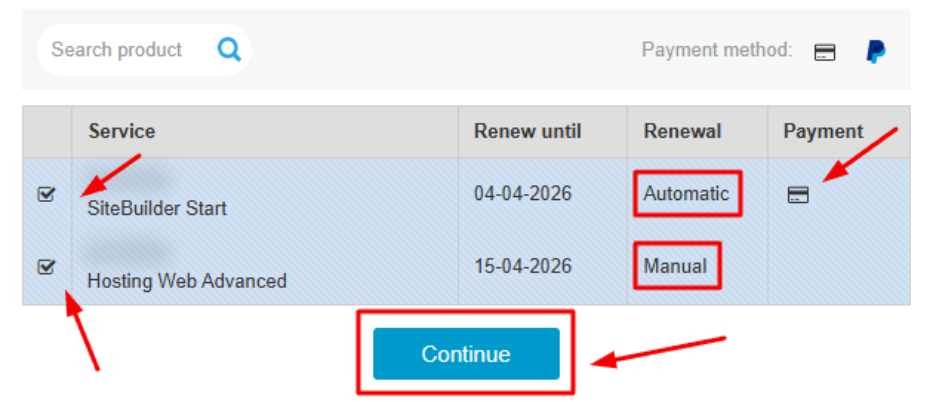
- Select services to manage. Choose the services for which you’d like to update the renewal method and click Continue.
- Set the renewal method. In the pop-up window, choose one of the following options:
- Everything automatic / Everything manual (bulk action)
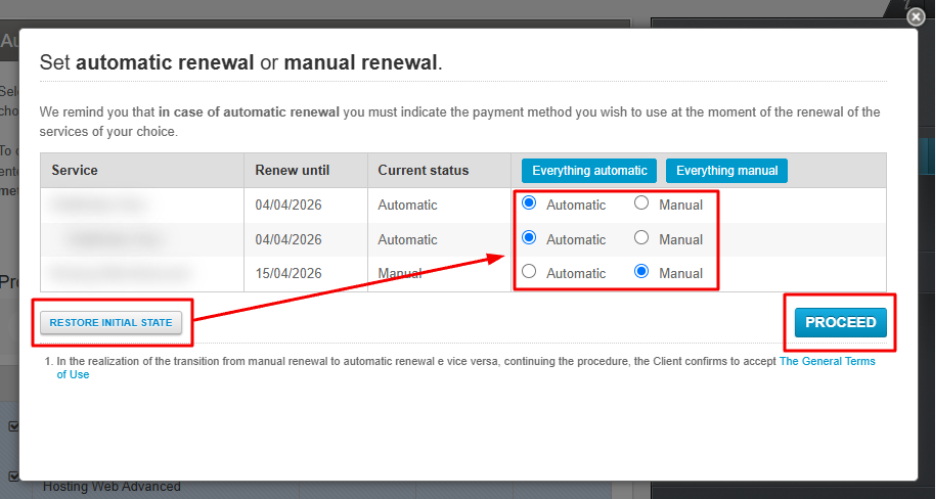
- Automatic or Manual per individual service
Then, click Proceed.
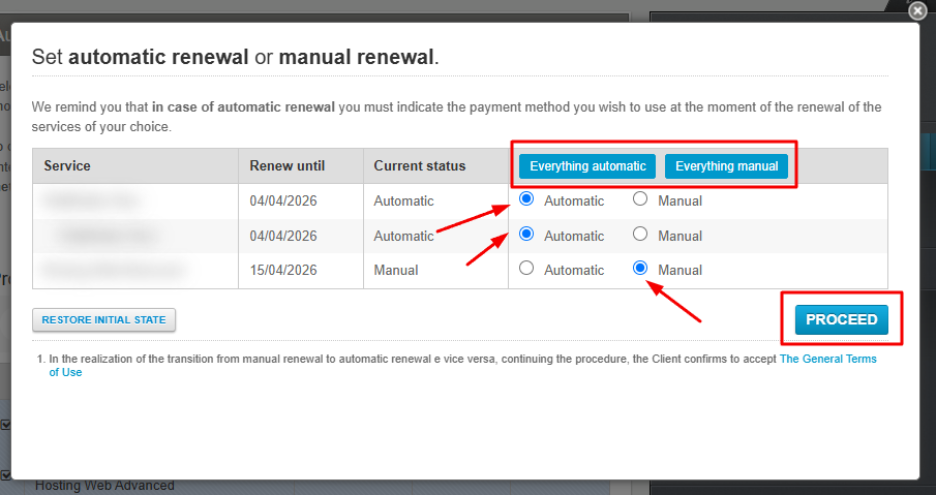
To reset your preferences to the previous settings, click Restore initial state, then Proceed.
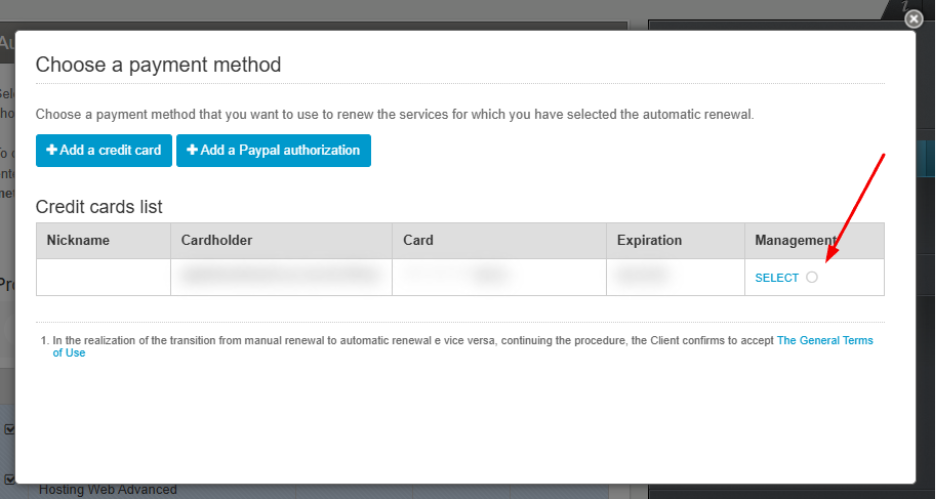
- Select payment method (if needed)
If you're switching a service from manual to automatic renewal, you’ll need to select a payment method in the next step.
If you haven’t saved a payment method or want to add a new one, you'll see the options:
- Add Credit/Debit Card
- Authorize PayPal
Click Proceed to save your changes.
Payment Method Setup
If no payment method is saved, you’ll need to choose one of the following:
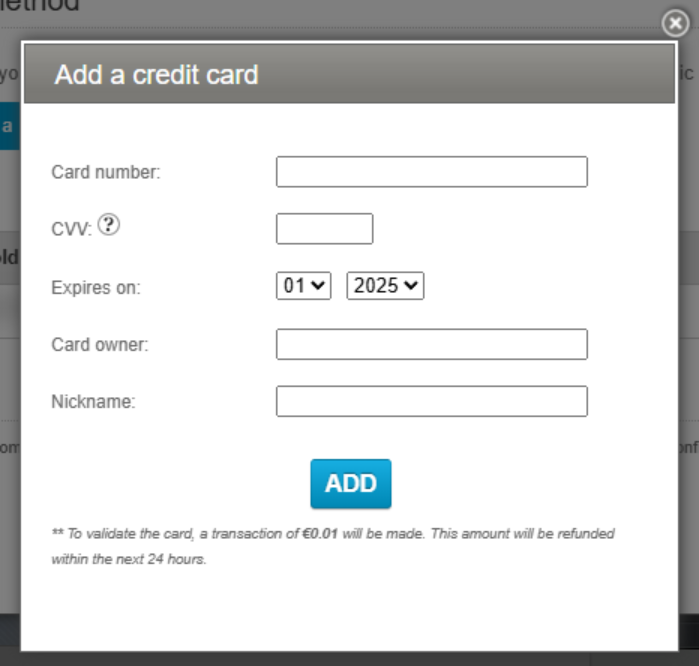
- Add Credit/Debit Card
Enter your card details. A temporary €0.01 authorization charge will be made to verify the card. This amount will be refunded within 24 hours.
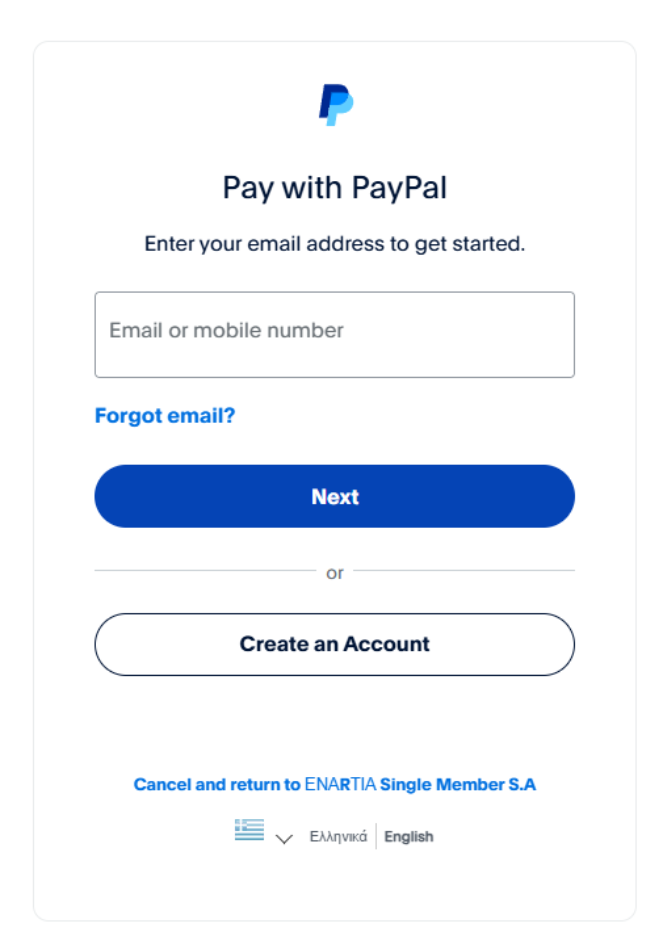
- Authorize PayPal
You will be redirected to the PayPal website to complete the authorization.
Additional information
Auto-renewal attempts
The system makes three attempts to auto-renew a service:
- 1st attempt: 12 days before expiration
- 2nd attempt: 11 days before expiration
- 3rd attempt: 10 days before expiration
If auto-renewal fails:
- A notification is sent 9 days before expiration, prompting you to renew manually.
- Additional reminders are sent at -7, -4, -2, 0, and +3 days.
Common reasons for failure:
- Insufficient funds on the card or PayPal account
- Inactive payment method
- Network error during billing attempt
Supported payment methods for auto-renewal:
- Credit / Debit Card
- PayPal
- Credits
When you first purchase or manually renew a service using a card or PayPal, auto-renewal is activated automatically for future renewals.
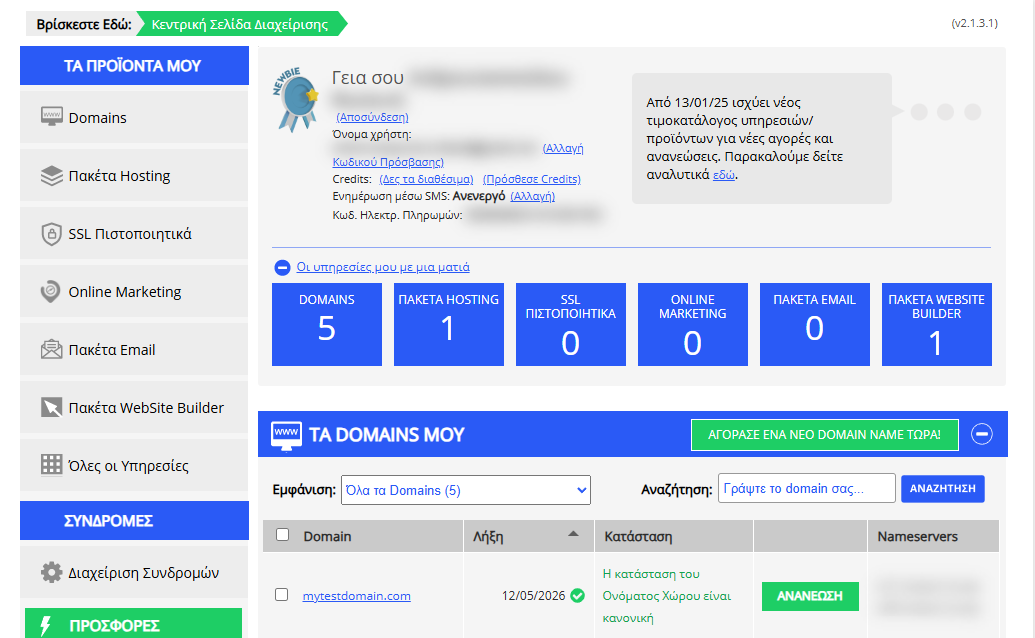
[Papaki 1.0]
At Papaki, you can activate auto-renewal for your subscriptions to ensure that your services remain active without interruptions.
Steps to Enable Auto-Renewal
- Log in to your Papaki account.
Forgot your password? See here how to recover it. If it's your first login attempt to the new Papaki panel, please read more here.
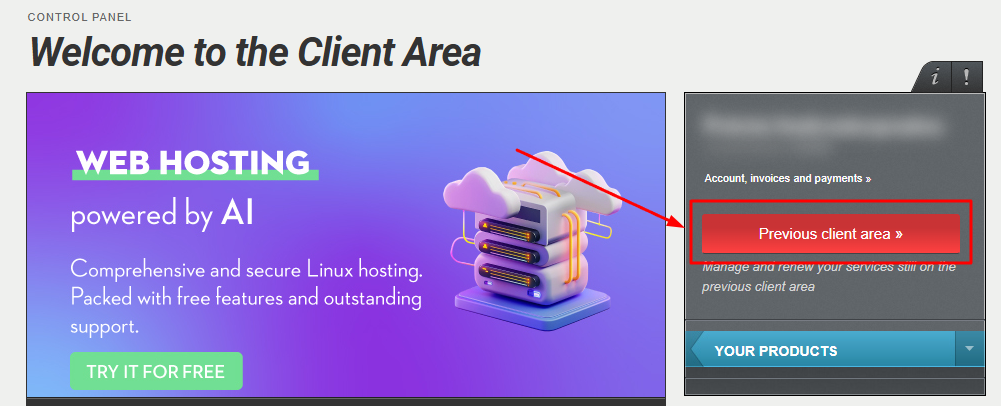
- Click the red button Previous client area » on the right side of the control panel to access the old Papaki panel.
- Go to Subscription Management
From the left menu, click Manage Subscriptions.
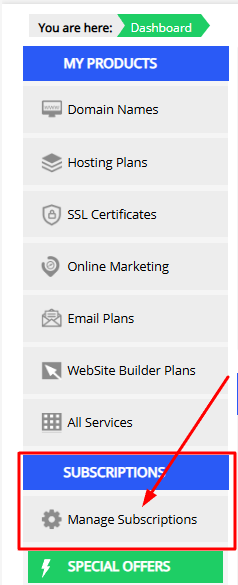
- Activate Auto-Renewal
- Find the service you want to manage.
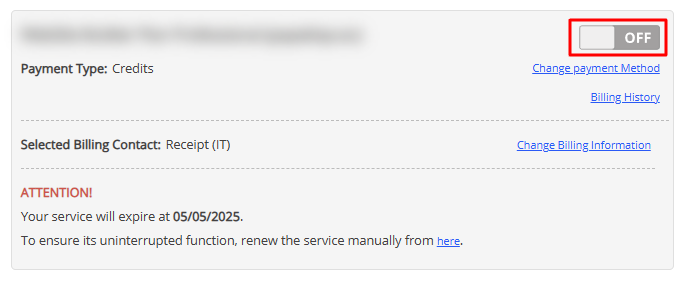
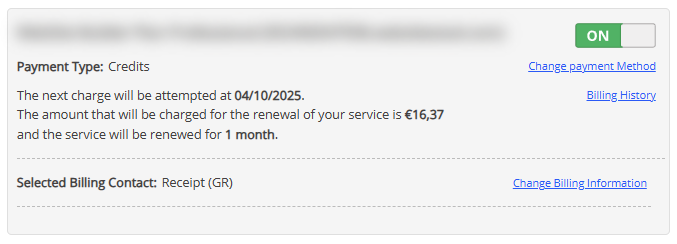
- Click the OFF button so that it switches to ON.
Note: If you want to deactivate auto-renewal, simply click the ON button so that it switches back to OFF.
- View Renewal Details
In the updated view, you will see:- The charge amount.
- The exact date when the auto-renewal will take place.
Note: If you want to deactivate auto-renewal, simply click the ON button so that it switches back to OFF
Important!
- To activate auto-renewal, you must first set up a payment method and billing details for the specific service.
- If these details are missing, you’ll be asked to add them before enabling auto-renewal.
You haven't found what you are looking for?
Contact our experts, they will be happy to help!
Contact us